Tuesday, 7 January 2014

Digi Choosday Challenge...Wk 1 - Anything Goes/New beginnings

Happy New Year everyone! 
Wow the festive season sure passed in a flash, it feels like ages ago already!
So we're fired up ready with a whole new year of challenges for you and we hope you're all going to join in!

Before we get to that, must remind you that Nikky will be on Create and Craft TV tomorrow with another great Graph'it Marker show for Premium Crafts so we hope you can tune in at 2pm!
Have you seen this gorgeous new collection from Polkadoodles too? You can get this in the store now and it's a total bargain and full of complete girly beautifulness! a definite must have all the team think, they are adoring using this collection it's just TOO cute!

Our challenge this week for you is, as always, 

Anything Goes

but for the Design Team this week it is
New Beginnings

We hope you join in the challenge with us - you have until Thurs 16th Jan to enter and our random winner will be announced on Tues 21st Jan. The winner of this challenge will get a great download bundle worth £10!

Let's see what the team came up with for this challenge and you can see the winners of our last challenge at the bottom of the post : )


Anjie For my project this week I have made a gift box that will fit a few little baby onesies in. The image is New Baby by Emma Canning which is on the Digistamp Heaven CD Rom Collection, and is coloured with Graph 'It Markers. The papers are from the Boys Hoot Download Bundle. This bundle is great for quick cards as well as it contains: 10 coloured embellishments, 8 sentiments and 11 A4 patterned papers, and is an instant download. I have used a die cut banner, some ribbon bows some hearts and added some faux stitching for extra interest.


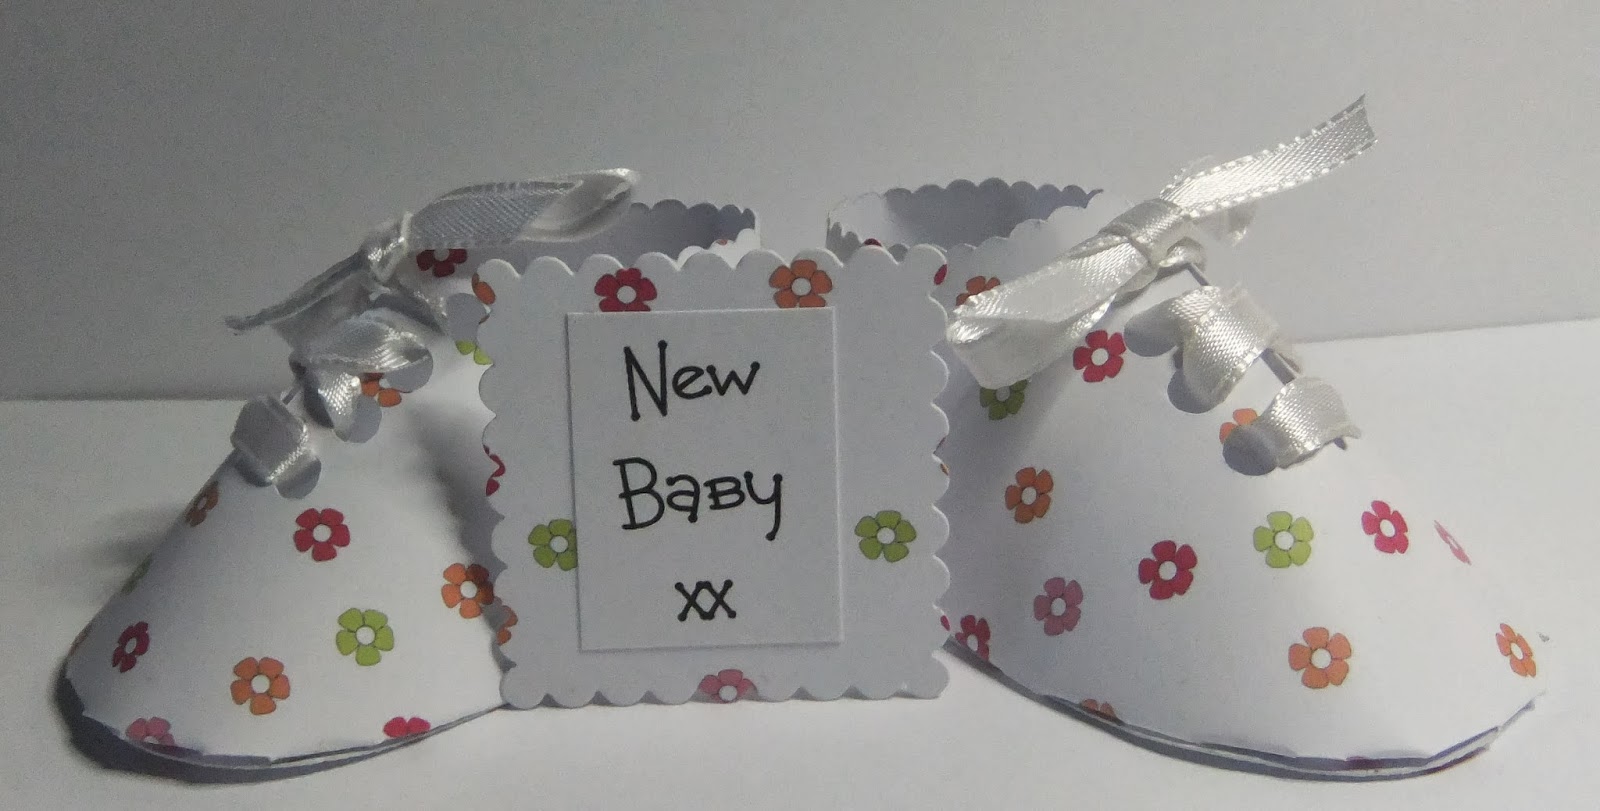
Scatty Jan For my project this week I have chosen New Baby awwwww - I have cut out some little baby shoes on my portrait using the wonderful paper from the Girls Hoot Collection - simply tied with some plain white ribbom - how cute xx


Debbi - Well, I can honestly say that 2013 has not been a very good year for me, in fact I can honestly say it has been an absolutely terrible year, but with 2014 now here I am determined to find the silver-lining in what ever I can. So with that in mind, for this weeks 'New Beginnings' project I have made a Positivity Jar. What's a Positivity Jar, I hear you ask. Pop over to my blog and I will tell you all about it.

Zoe - For me, the New Year gives me chance to wipe the slate clean and come up with new ideas & plans. So I made this sign to go in my craft room to remind me - I used the new and gorgeous Dollie Daydream collectionTwo of the sentiments created the background paper (both referring to shoes!) and then I used the stunning shoe which I printed three times so that I could decoupage it. I coloured each part using a mix of markers including Graph It's. 

Katrina - My take on 'New Beginnings' is Weddings - this week I chose to work with some of the beautiful items from the new CD ROM Dollie Daydream Girl Talk - This is a first for me as it was all designed on my computer using my studio software and the CD ROM and then just printed off - I printed the topper twice and cut it to add depth and finished by adding some flowers and butterflies.


Susan I am using this fabulous New Collection Dollie Daydream Girl Talk .This is an amazing collection by the very talented Nikky ,
I have used elements from the Collection and taken it into Craft Artist to make this invitation


Jo - For my card this week I used the Camille mum to be digistamp coloured with a mix of Promarkers and Copics, and papers taken from the new Dollie Daydream collection (which I am in love with!) I love the white with black polkadots, so simple but really effective!
Sally - Hi there.  This week's challenge is new beginnings. So I thought I would cover my notebook, I always have a new one each year for my orders, things to do and of course a little bit of doodling.
I used the new Dollie Dream CD Rom and took papers, embellishments and girls into my Craft Artist programe. There I put together this cover for my note book. I then printed off some sentiments and adhered them to the front. There, it was so quick and easy.


So there's the inspiration for today! 
I'm sure you'll agree that they're all superb makes again this week, love love love all the work these guys have put in!

The winner of our Week 10 Challenge was

#18 Mikha - well done, you've won £5 of downloads! 
Please email us here to claim your prize!
Our Top 3 favourites from that week are:
#10 Danielle #12 Chrissy #18 Mikha 
- well done everyone, grab your Top 3 blinkies from the sidebar!

Remember you do NOT have to use our products (although obviously we would love it if you did) , just add your entry to Mr Linky below and pinch our badge for your blog sidebar - we'll see you back here on Friday for our usual Polkadoodles challenge....

Rules: 
1. No backlinks
2. Please FOLLOW the challenge theme!
3. ONLY TWO ENTRIES PER PERSON ALLOWED to make it fair for the random winner!
Mister Linky's Magical Widgets -- Thumb-Linky widget will appear right here!
This preview will disappear when the widget is displayed on your site.
For best results, use HTML mode to edit this section of the post.

Saturday, 4 January 2014

Tutorial: A Christmas Card Keeper!

Hello everyone, Zoe here! Today, I'm going to share my very first tutorial with you all. As it's the start of the year, most of us are tidying away the Christmas decorations and cards. As crafter's we all (I assume) receive gorgeous handcrafted cards from our crafty friends and, if you are like me, I can't bear to hide them away in a box what alone get rid of them. So I've made a Christmas card keeper that can be filed into Project Life or into a journal or folder. 


In order to make this you need two paper bags and some papers and embellishments to decorate, along with some ribbon. I chose to use papers and embellishments from the fabulous 'Angelberry' collection.

I started by preparing my two paper bags - 
I cut off the handles and glued the bases together.
As the two bags are going to lie like pages (like a bag album) I spent time making sure I could fold the bags backwards and forwards once the glue had dried.
Burnishing each fold/line.

Once happy I set about decorating my base. As I used two bags there are obviously two pouches to hold cards and four sides to cover so I printed off enough papers and embellishments to cover all the areas.


The bag bases create the spine so I also decorated the part that's inside. I may stick one of my bigger cards to this spine, creating another "page" if you like. It's important when covering the bags that you don't glue the openings together as this is where you keep your cards!!

Here you can see a small card popped inside the bag. My idea was to create a project to keep those special cards and I feel this is a great way to do so. Once each pouch is full you could clip it together or punch a hole and secure it with some extra ribbon. I haven't done this yet as I haven't taken down my cards!

As you can see in the top photo I punched two holes in the spine and tied some ribbon through, I could leave it as a separate album or pop it into a folder or journal. The finished project measures 8 1/2 x 7 inches.

I enjoyed preparing this tutorial for you and hope it provides a little inspiration.
Take care Zo x


Friday, 3 January 2014

Week 1 Challenge - Anything Goes!

Hi everyone, Happy New Year! 

We hope you all had an amazing time over the festive season and are now ready and raring to get stuck into a new challenge!

Firstly we have a bit of news for you....introducing our gorgeous brand new collection
Dollie Daydream's Girl Talk....

Gorgeous and girly and available to order now! 
If you're quick you can also save 15% in our sale before it ends! Just what the New Year ordered! 

We also have a little heads up for all you colouring fans out there - you can catch Nikky on Create and Craft TV on Tuesday next week with with another fabulous Graph'It show so if you love colouring make sure you check it out on Sky 671, Freeview 36 or you can watch online at www.createandcraft.tv.


This week we decided to give the Design Team a little break but we've asked them all to choose their own favourite make from 2013 - and boy do we have some great ones to show you here! AWESOME! 
Of course, as always for you at home our challenge is 

Anything Goes 

so we hope you all play along with us.
The winner of this challenge will receive £10 of downloads from the Polkadoodles store! Woohoo!


You can see last time's winners at the end of this post : )
......................................................

So let's see what the team have made this week! ....

Ruth:  I've gone all the way back to May 2013 to show you this, made with papers from the Fredericka cd that I've cut out and inked and the sentiment is from Cherryblossom Lane and I've also inked that too.


Lizzie - Gosh its so hard to choose a favourite as I LOVE all things Polka Doodles!!! Way back in April I made this card and gift box. I just loved them so much ! For the card I used the Stampies from the CD All Around and Everywhere. To make them large enough to make a card with I enlarged the view on them and used the printing option of current view. For the box I used the CD All around and Everywhere for the images. The paper I used from the CD Picknix 1. I just love how the words look like clouds!

Zoe - Choosing my fav was easy, I chose my santa wreath where I decided to set myself a task of using the digi images from the amazing Home For Christmas CD  to create a wreath. I chose the fabulous Poinsettia and the super santa. I took both into Serif Craft Artist and digitally manipulated the images - flipping to face the opposite way & changing sizes - positioning them around a rough circular shape. Once happy I printed it off and coloured every single image with a mix of markers including some Graph It markers. I chose more contemporary colours to match my home decor and once coloured I attached a ribbon."


Shell-Wow what a tough decision that was. I picked my super hero wall hanger as my fave make of 2013, I love it and Jake loved it too. I used papers from the Not for Girls CD 

Anjie Choosing my fave make from 2013 was a very hard job for me as I love all PD products! I eventually decided to go with these tags from October. I used the A Home for Christmas CD Collection  I cut out 3 tags in Kraft card and then printed some papers, embellishments and sentiments from the CD. I cut out three strips of papers for each tag and distressed the edges using distress ink. I glued the papers onto the tags and added some faux stitching with a white opaque pen. I then cut out all the embellishments and stuck them in place. I then used a distress ink on the sentiments and added them. I finished off the tags with some ribbon.
Claire C  It was hard to choose a favourite project as Nikky has released some amazing cds this year, anyway eventually I decided on this card made for our birthday girl challenge in August. The image is from Candy Doodles, I just love this CD! The image is coloured with Graph'It Markers
Rebekah - I actually had 2 favourite makes from 2013 but as one of them was the birthday card I made as the last make of the year...
it was only shown recently so I have chose the bunting I made with the Home for Christmas CD as well..
I used pre coloured images for my "NOEL" bunting and added hanging baubles, also pre coloured from the CD, from the bottom for added effect. 

Finally, our Random Winner from Week 50 is
No 7 Kendra
Well done! Email us here to claim your prize!

Our Top 3 faves from Week 50 are:
#43 Valerie

Well done everyone - grab your blinkies from the sidebar! 

Closing date for the challenge is Sunday 12th January at 12noon GMT and don't forget to link your actual blog post so we can come and visit you!
Rules: 
1. No backlinks
2. Please FOLLOW the challenge theme!
3. Maximum of 2 entries per person!

Mister Linky's Magical Widgets -- Thumb-Linky widget will appear right here!
This preview will disappear when the widget is displayed on your site.
For best results, use HTML mode to edit this section of the post.