Showing posts with label Angelberry christmas. Show all posts

Friday, 23 October 2015

Week 43 - Crafting Challenge at Polkadoodles - Add Sparkle, Bling or Glitter

Shop on Etsy

--------------------------------------------------------------
'Tis Friday, well it is!
Can only mean one thing - another week has gone by in the blink of an eye.
Talking of blinking :-)

Our theme for this fortnight is

Add Sparkle, Bling or Glitter

The winner of this challenge will receive a $10 gift certificate
to the Polkadoodles Download store :-)

Before you take a look at what the Design Team have on
offer for you this week,  why not go and take a look at the
What's New section of the Polkadoodles Store.
Nudge, nudge, wink, wink, say no more ;-)
Something totally awesome is waiting in the NEW section!! eeeek! We are SO excited!!! 

Polkadoodles Ltd

Ok now let's take a look at the Design Team inspiration for you.

Scatty Jan - For my card I have used the fantastic template from Twiggy and Toots collection I then used the uber cute little robin from Frosted Winter Collection. Also from that collection came the paper, and all the other elements. I cut some snow from white paper and glittered it up to finish.


Jackie - For my card this week I have continued to make good use of the brilliant collection of digi images in the Work and Play 5- Festive Hollybobs collection. It can be purchased as a cd or as a download and of course the digis can be purchased individually. The image here is Hollybobs Mistletoe Kiss. Details are on my blog.


Asha - I made a centre step card with image, paper and digital embellishments from the Angelberry Christmas CD. I coloured the Angel with Faber Castell Polychromos. You can also purchase the image as a separate download here - Angelberry Pressies. For that festive sparkle, I added bling, Stickles and sequins.


Jenny - For my card for the add some sparkle challenge is a big one! I used my Cameo to cut out the cards and it ended up with eight panels but I couldn't get them all on one picture. I edged all the pictures with glitter and also added glitter to the holly in the corners.  The images are all from the Octavia Frosted Winter Collection and I used the coloured ones for this.


Jessie - This challenge really stumped me, I use lots of basic things but glitter bling and all that is not a regular occurrence for me. So I started by blowing Odella with Bag up to fit a 5 1/4" x 3 7/8" panel to cover the entire front of my card, then I coloured her up with my Copic Markers. I decided that for my sparkle I would add some Wink of Stella in clear to the heart on her cheek as well as on her shirt (that is what the tiny white spots actually are.) Then when I finished that and matted it all and got the card built I remembered that Wink of Stella does not photograph well so I took one adhesive back rhinestone and adhered it to the heart on her shirt.


Ria -  For our Sparkle, Bling or Glitter challenge I choose this card with the pretty Serenity Stardust from the Serenity Collection. I coloured her with Pencils and added glitter(stickles) and I used my lovely glittery ribbon so love this I will cry my eyes out when it is all gone ;) hahaa well I hope you all join us .


Karon - I decided to make one final Halloween card for my challenge inspiration this week.  I used several of the new bundles for my creation.  Sentiment on the moon is from the Spooky Sentiments digi download, the papers are from the Halloween/Autumn Paper Heaven 1 download bundle, and everything else is from the Witchie Witchie 2013 download bundle :-)  I added glitter to the face pumpkin and the little bats :-)


Aunty Sue - Well when I think of Sparkle, Bling or Glitter and it is edging for Winter it just has to be a Christmas card. So what better than the fabulous Cd Octavia Frosted Winter. I have coloured my image with my Lyra Rembrandt Pencils and added snowflake embossing folder lots of Glitter card, gems and snowflake ribbon. A few dies to embellish and set the scene
.

Wendy - For my glitter card, I've used one of the design sheets from Octavia Frosted Winter. I love these design sheets, they all have enough elements for at least 2-3 cards on a single sheet! I've teamed with some glittery pink card, lots and lots of Stickles and just a few Aurora Borealis stick on gems. Sparkle a plenty!


WOW - that should get you all inspired. So off you go and craft something amazing.
Then come back here and link it up to our challenge

Add Sparkle, Bling or Glitter
You have until Noon, GMT, Friday 6th November to enter.
Please remember only 2 entries per person.
And we only have a few little rules over there in the side bar ---->

Happy crafting everyone.
See you next week.

***
Mister Linky's Magical Widgets -- Thumb-Linky widget will appear right here!
This preview will disappear when the widget is displayed on your site.
If this widget does not appear, click here to display it.

Friday, 7 November 2014

Week 45 - Recycle It - Polkadoodles Challenge

Hello everyone and welcome back to the Polkadoodles challenge!
Don't forget that every Tuesday we have a great inspiration post full of colouring ideas for you from the Digi Queens so check it out below this post - and did you know that our sister team Digi Choosday have a fab Tuesday challenge for you to? make sure you sign up, there are often Choosday/Tuesday deals and offers so you need to make sure we're on your blogfeeds and join up with us over on Polka Doodle Dandies, our Facebook group for even more specials and all the daily news from the team!

So here we are, week 2 of our Recycle It Challenge.
Do you think we are all getting in Christmas mode LOL!
You don't have to make something Christmas to enter the challenge, just tell us what you
have reused in you project, on your blog.  It's always good to see
what us crazy crafters can reuse, don't you think?!
You can Recycle anything you wish - and this can be something as simple as reusing a bit of ribbon!
You have until Friday 14th November  noon GMT to enter. Just please follow the rules in the sidebar. You don't have to use our products to enter!
THE WINNER OF THIS CHALLENGE WILL RECEIVE A COPY OF THIS BRAND NEW COLLECTION WHICH IS WORTH £11.99!
Have you seen the latest new release at Polka Doodles.....

** Work & Play Collection 7 - BONUS EDITION

The winners of your weeks 42/43 Christmas Fun challenge are at the end of this post.

You can enter the current challenge
Recycle It - HERE

But first lets see the Design Teams inspiration for you this week....

Anna Wow! It’s been a long time since I made a card with flowers! Recently I’ve been making mostly round and Christmas cards, so today, especially for you, something elegant with flowers. A multi-layered card, with the aforementioned flowers, ribbons, white tulle, pom poms, paper doilies, a Polish cut out sign ‘Sto lat’ (roughly translated, it means ‘May you live a hundred years’), also something recycled from a blouse, i.e. gray tulle with gold accents and sequins. The paper, which I used comes from Rose Budd collection. If you want to see more photos, I invite you to  visit my blog.

Lou: I have used lots of recycled bits on my card: kraft card is from a cereal box, lace from ..who knows, corrugated card from packaging and canvas effect card from the inside of a gift box. I have used the Perfect poinsettia and Christmas Doodles stamp sets, coloured with my distress inks. Full details and more photos are on my blog.

Scatty Jan The other week I was using some spray and sparkle on some poinsettias , I had sprayed them on an old bit of Kraft - When they were dry and I took them off I loved the Kraft more than the poinsettias and definitely couldn't bear to throw it out. The photo does it no justice it is just full of sparkle and magic. Perfect for this Challenge.

I decided to pop it on as the background for my bag . I coloured up using Graph'Its the wonderful digi image Octavia Thinking. The Bow is from the Festive Hollybobs collection and the flowers are from the Cherryblossom Lane CD.

Asha - My project started with something yummy wrapped in gold in a brown paper cup. I used paper from Festive Hollybobs, a sweet angel and candy canes from Angelberry Christmas and a sentiment from Gingerbread Twist to make a tag. The gold wrapper is a band in the middle of the tag and the brown paper cup is now a halo around the angel. Extra embellies from my stash: ribbon, twine, Stickles and Liquid Pearls. I also used Graph'It markers to add extra colour to the digis.


Karon - I had these bottles from some little flowers that I have placed in better storage.  I decided they would be perfect to fill with treats.  So I removed all the labels and ran them through my dishwasher to sterilize them and then decorated and filled them. Before...

I used the Work & Play 5 Festive Hollybobs collection.  I decided to showcase just 4, out of the many, design sheets that are available in this fabulous collection.  These are great if you want lots of elements already put together and are great for making quick cards and projects.  I wrapped each bottle in papers off the CD and also made some little rosettes for the bottle tops.  Here are my bottles all filled and decorated.
Cheremane - I have decided to use a empty tin to make my remote control holder for my recycled project seeing we all have empty tins at home. Make sure you give it a good wash first though.

I've used the fabulous Winston Cd to make my recycled remote control holder for my hubby, mind you he can never find the remote as I always have it. The Winston Cd is pack full of gorgeous images, papers and accessories galore. The main image I have used is Winston Bear Snoozy Days which you can get on his own as a  Digi download as well. Head on over to the Polkadoodles Shop where you can get lots of crafty goodies to help you remake my project.


Samantha K - I used the wonderful Work and Play 6 Collection to create a get well pen.
There are a great range of images and embellishments and as always papers, in this collection, something for everyone :) For my recycled item I used an old pen that was the type you get given advertising a company with their details in the barrel. I emptied these out and added my own bits :)
Its a fully working pen. I created a little image square, with a character, some flowers and a sentiment (all from the CD) and I had a pen with a large barrel, that once taken apart, had the printed square popped inside to make a cute get well pen :)

Ashley- I Decided to make use of an extra wedding invitation print out and not waste paper. I was simple I wanted to recycle all my old scraps and papers so for my card I only used scraps and printed on old wedding invites =) I used the amazing Work & Play 5 Festive Hollybobs collection for the main image as well as the background paper and North Pole embelly. What's so great about the collection is all the amazing images work well with one another or as a stand alone image! So head on over to the store you don't want to miss out on these adorable images for this Christmas and Holiday season! 


Melanie - For my recycling project I decided to upcycle a glass candle jar for a first Christmas keepsake or gift. I used the wonderful Festive Hollybobs CD for this, which contains some lovely design sheets with papers, toppers and extra elements that were perfect for decorating this candle jar. I added some punched snowflakes, a chalkboard panel and red silk ribbon to finish. The final touch was a red silk ribbon bow for the candle jar lid. This Mistletoe Kiss image is also available as a clear stamp in the Polka Doodles store - gorgeous!

WOW - amazing creations and ideas!  

Now lets announce our winner (chosen by random.org) for our last challenge, Christmas Fun
#80 - Deonna B
Please email us here to claim your prize, which is a copy of the fabulous Winston Collection, please quote the code PDwk45001wk42

Now onto the Top 3 as chosen by the Design Team
#8 - Mummylade
#13 - Sandra

Congratulations to everyone and thanks for entering our challenges.
Don't forget to claim you blinkies from the side bar.

Recycle It Challenge can be entered HERE
Don't forget you do not have to use Polkadoodles products to enter our challenges
and please remember that there are a maximum of 2 entries per person.
Have a great week everyone.

Friday, 17 October 2014

Week 42 - Christmas Fun Polkadoodles Challenge

It's Friday again.
Where are these weeks going - soon be Christmas!

Talking of Christmas.
Our challenge theme for this fortnight is

Christmas Fun

So what ever you fancy with a Christmas theme, cards, decorations, even 
gift ideas.  We could all do with a little inspirational help this time of year.

You have until Noon GMT, Friday 31st October to enter.
The rules are over there in the side bar ---->
You don't have to use Polkadoodles products to enter the challenge and our winner will receive a copy of our fabulous Winston CD rom collection!


Please, though remember that there are only 2 entries per person.

So lets see what the Design Team have come up with for you this week.....

Scatty Jan For My Christmas card - I have used the fantastic Dollie Daydream goes East for the main image and the sentiment., I just replaced the tea cup with presents, that were from the Festive Hollybobs collection along with the papers and tree. I coloured with Graph'It Markers xx


Asha - Apparently Dollie Daydream images work for Christmas too. Here I'm using the Glitz Dollie from the Dollie Daydream Girl Talk Bonus Edition CD. She is also available as a digi download. I coloured her with Graph'It markers. The papers and greeting are from the fabulously lush Angelberry Christmas CD. Keeping it simple with just a few bling and a sheer bow.

Cheremane. For my Xmas make I used Festive HollyBobs Cd I adore the Skater girl and whats more you can get her on her own as an instant Digi Image Download and even as a Clear Stamp and lots more of the Characters are also available too. To make my pond for her to skate on I used Glossy accents and glitter. Pop on over to the Polkadoodles Shop for all you crafting needs.


Cara: I too used the Work and Play collections for my project, I used the adorable little Ballerina from W&P 2, the papers i printed direct on to my cracker is from W&P 1 and the sentiment is from the Festive Hollybobs CD.  Did you know you can also get the little Ballerina as a clear stamp amd also a Digi image! How fab!


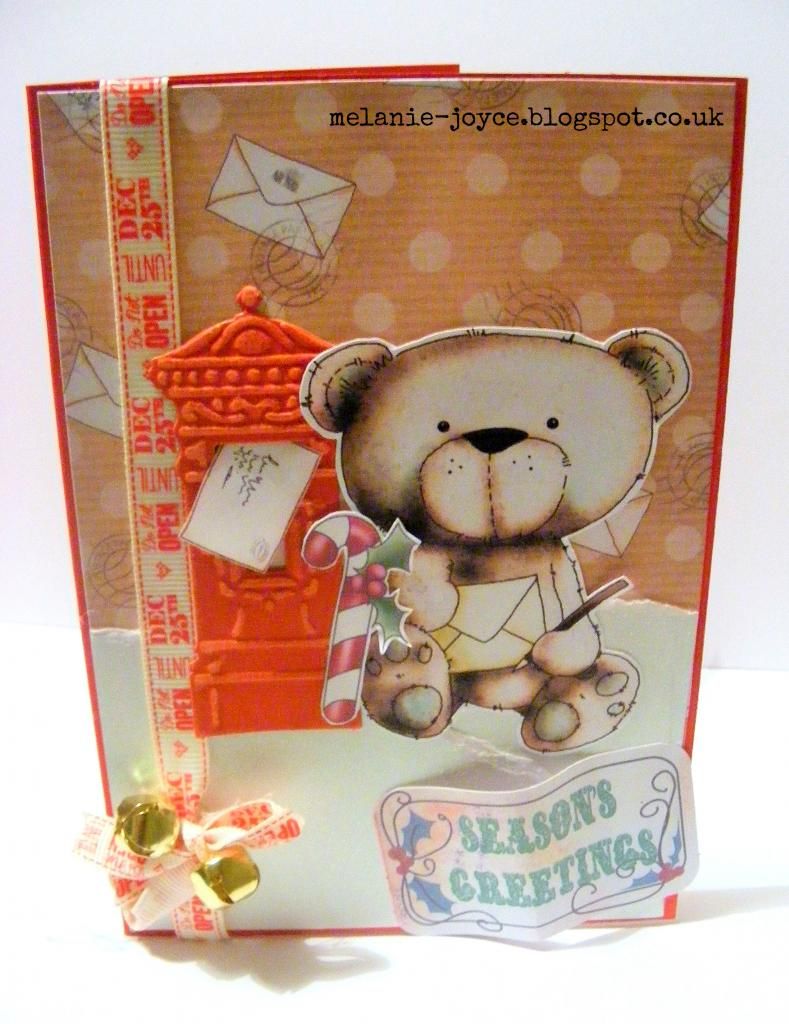
Melanie - I used the adorable Winston CD as the focal point for my card, mixing the backing paper and image from the CD with a little Christmas candy cane and sentiment from the Festive Hollybobs CD. Some extra merriment was added with the help of some glitter card, gold jingle bells, Christmas ribbon and a die-cut and sanded postbox.


Karon - I used the ballerina from the Work & Play 2 collection, she is coloured with pencils, and I added a little bit of glitter pen to her too.  The papers are also from this wonderful CD.  I added some butterfly wings from the Bonbon Belles Double CD collection to turn her into a Christmas fairy.  I also used some trees, a mushroom house, embellishments and sentiment tickets from another fabulous collection the A Home for Christmas CD.  


Samantha KI have made an advent slider, with Etty bear from the Winston CD as the star main attraction at the top.  As the numbers are pulled through to show the next date and then pulled out completely, Etty drops down, making her way down to the fireplace and presies :)  The other elements hanging on the wall and fireplace and the paper used for the sliders, are all from the Festive holly bobs CD.  To hopefully make Etty look a little more festive, I changed her dress to a red and also her presie, which could quite easily be a Christmas presie.


AnnaI made a round card again and again with a beautiful red deer. I hope that you’re not bored with so many round cards, yet. This one is entitled “A letter to Santa Claus” and I decided to make it mainly in white. Consequently, I used white doilies, cut out houses, tulle, a drapey fabric tape, a huge bow, pom poms. But also I used pictures, such as the one with Santa from Picknix Collection 2...Gingerbread Twist CD . The whole is rounded off with artificial snow attached with gesso, as well as with silver and red glitter glue.


Lou: I have used the Postwoman from Work and Play 6 so that she is now delivering all out Christmas letters, card and parcels. I also used the letters background paper which is also on the CD. I have added a little stamping and die cuts to make her even more "festive". Full details are on my blog.


WOW!  Awesome creations from the Design Team this week.
Hope it inspires you to start getting your Christmas creations ready.

Can't wait to see what you are all creating.

So off you go now, and don't forget to come back and enter this fortnights challenge

CHRISTMAS FUN!

******

Mister Linky's Magical Widgets -- Thumb-Linky widget will appear right here!
This preview will disappear when the widget is displayed on your site.
If this widget does not appear, click here to display it.

Saturday, 4 January 2014

Tutorial: A Christmas Card Keeper!

Hello everyone, Zoe here! Today, I'm going to share my very first tutorial with you all. As it's the start of the year, most of us are tidying away the Christmas decorations and cards. As crafter's we all (I assume) receive gorgeous handcrafted cards from our crafty friends and, if you are like me, I can't bear to hide them away in a box what alone get rid of them. So I've made a Christmas card keeper that can be filed into Project Life or into a journal or folder. 


In order to make this you need two paper bags and some papers and embellishments to decorate, along with some ribbon. I chose to use papers and embellishments from the fabulous 'Angelberry' collection.

I started by preparing my two paper bags - 
I cut off the handles and glued the bases together.
As the two bags are going to lie like pages (like a bag album) I spent time making sure I could fold the bags backwards and forwards once the glue had dried.
Burnishing each fold/line.

Once happy I set about decorating my base. As I used two bags there are obviously two pouches to hold cards and four sides to cover so I printed off enough papers and embellishments to cover all the areas.


The bag bases create the spine so I also decorated the part that's inside. I may stick one of my bigger cards to this spine, creating another "page" if you like. It's important when covering the bags that you don't glue the openings together as this is where you keep your cards!!

Here you can see a small card popped inside the bag. My idea was to create a project to keep those special cards and I feel this is a great way to do so. Once each pouch is full you could clip it together or punch a hole and secure it with some extra ribbon. I haven't done this yet as I haven't taken down my cards!

As you can see in the top photo I punched two holes in the spine and tied some ribbon through, I could leave it as a separate album or pop it into a folder or journal. The finished project measures 8 1/2 x 7 inches.

I enjoyed preparing this tutorial for you and hope it provides a little inspiration.
Take care Zo x


Sunday, 24 November 2013

Tutorial - Paper Bauble

Hello there! Asha here and it's my turn to do the weekly tutorial. I'm going to show you how to make this fun paper bauble which was posted on Friday for our PolkaDoodle Challenge "Inspired By A Christmas Carol".


1. Cut out 20 circles out of patterned paper of the same design or a combination. You can use a die or a punch to cut out the circles but make sure they are all the same size. For my sample, I used a 2" die. Also, cut / punch 1 extra circle out of plain paper which will serve as a template.


2. Make a triangle template. Take the plain circle and fold it in half horizontally and vertically so that the circle is creased into quarters (circle 1 below). Fold each side to meet the centre starting at the bottom (circle 2 below).  Next fold down the top right, followed by the top left, each time meeting at the centre. (circle 3 below). Cut along the crease lines and you will end up with an equilateral triangle. This is your template (circle 4 below)


3. Place the template on the circle, with the pattern facing up, and fold up the circle along the sides of the triangle. Make sure you get a good crease on the circle to match the triangle template.


4. Repeat this on all the remaining circles.


5. Start by glueing 5 circles at the folded flaps, as shown below. This will form the "lid" of the bauble.


6. Cut some twine or thin ribbon, fold in half and tie a knot to make a loop.


7. Carefully pass the loop through the middle of the "lid". Use a needle or pokey tool to help you push. Pull the loop through until it stops at the knot. The "lid" is now ready.


8.  Next, glue 10 circles together in a strip - this will form the body of the bauble. Finally, glue the remaining 5 circles in the same way as for the "lid" to make the bottom.


9. Finally, assemble the bauble by gluing the top 5 flaps of the strip to the 5 free flaps of the "lid". This will leave you with 5 free flaps (see below) which you will glue to the free flaps of the bottom piece, thereby closing the bauble and completing the sphere.


10. Your bauble is now ready! 


This project was great fun to make. It does involve some cutting / punching and folding, which makes this the perfect project for the entire family.  Have fun making these for Christmas!