Sunday, 28 April 2013

A Little Box of Notecards

Happy Sunday to everyone out there,

JAN here today with a little make for Studio 12, 
using the very versatile 'Picknix Collection 1 CD'.  Here's what I made ...


First of all I made a little box from white linen cardstock 
and topped it with a mat of red card and then a topper with one of the pretty flowers 
from the CD decoupaged on top. I also added a little 'Thank You' stamp too.


Inside the box is a set of three dinky little notecards bearing the same flower 
and a gorgeous sentiment 'Earth laughs in flowers', also from the CD.

Hope you enjoy the rest of your weekend,
Hugz, Jan xx

Friday, 26 April 2013

Week 17 - Birthdays With Bling

Good morning everyone and welcome to a new challenge at Polka Doodles. We hope you're all having a good week and have some sunshine at last now that Spring has finally made an appearance.

Did you notice something new on the blog? We will now be giving you some fabulous TUTORIALS!! The team will take it in turns to bring you some great step by step makes to help inspire you, so make sure you check out the first fantastic one from Alethea HERE and check out the fabulous make that Ruth has for you below this post too! We thought as it's our first TUT DAY we'd give you all a double-whammy...this team is way too talented not to bring you some of their amazing ideas so we all thought we'd share with you now and then! Enjoy them and show us what you make! :D

Before we get to the challenge inspiration, we need to announce the winners from the Week 15 April Showers Challenge - there were loads of fabulous entries as always which made it very hard for the DT but there can only be 3 winners and here they are:

1st Place - Mema's Crafts - you win the Emma Canning Digistamp Heaven CD and please use the code PD1W1715 to claim your prize
2nd Place - Pauline - you win an Emma Canning Download and please use the code PD2W1715
3rd Place - Krafty Karen - you also win an Emma Canning Download and please use the code PD3W1715

Congratulations to you all.  Please email Nikky and don't forget to quote your winners code - we cannot release prizes without it! 

We have a few little rules which makes our life a lot easier when we come visiting your blog:

1.  Please follow the challenge theme!
2.  Only enter your creation into a maximum of 10 challenges including Polkadoodles
3.  Please link your blog post and not your blog address with the linky tool - this saves us from searching your blog for your entry
4.  And please, no back-linking to previous posts - these will be disregarded from our top three voting
5.  If you have word verification on your blog it really does slow us down when leaving comments - please consider turning off word verification especially as the comment moderation has a spam section.


This week's challenge is to make something for a Birthday with some added Bling and as you'll see, the Design Team have blinged up some fabulous creations for you. There are some fantastic prizes this week too as the winner will receive the Cherryblossom Lane CD and the 2 runners up a Download.


Karon - I decided to use Fredericka Debutante, from the Fredericka Mini CD Collection, she can also be purchased as a single image.  For the papers I used the Cherryblossom Lane CD.  She was coloured with alcohol markers and then I added some bling to the hair and the sentiment, which is also from the Cherryblossom Lane CD.  A ribbon and a half doily to finish off the card.


Asha - Me too! I'm using a pre-coloured Fredericka Debutante from the Fredericka Mini CD Collection. I made this card for a 17 year old girly-girl and I wanted something I could whip up quickly, but looked like I spent time putting together. Polkadoodles makes cheating so much fun! The background paper and greeting are from the mini CD. To jazz things up, I made flowers using scraps papers from the Cherryblossom Lane CD, a touch of Stickles and, of course, plenty of bling!


Sally - Hi this week it is Birthdays with Bling - I love this image from the new Fredericka CD Rom
as I think she looks classy. So I coloured her with my Promarkers and Graph it markers. Added a little bit of bling using pearls in glue form and some other flower ones.  I cut her out and matted her on Spellbinders die with some patterned paper from my crafty stash, then cut out again using a Spellbinders die in white and then added a soft pink Pan pastel around the edge. I then added a bow, sentiment and flower and matted her onto some grey embossed cardstock and then onto the card blank.  I think is one Classy Lady x


Alethea - Happy Birthday to me!! Yes it is my birthday today so I altered a small box to turn it into a gift box for a watch I bought last month (for my birthday present from my boys). I had a lot of fun creating this which I will explain in more detail in my tutorial which I will be sharing with you today!! For my box alteration I used papers from the new Fredericka mini CD collection and images and sentiments from the Double Sprinkle of Kraft CD. I then added lots of bling....

Fliss - My card is made with my favourite on the Fredericka CD, the lovely Libby the gypsy girl. I printed her out on to thick cartridge paper and coloured her with my new obsession, Distress Stains. I then die cut her and added my bling to the card with matting and layering with bright pink glitter card. The papers and sentiment are also from the CD and I trimmed along the scallop on the fab mushroom paper for added interest. A pretty doily, pink chiffon ribbon and a lacy metal butterfly finish off my creation.


Miria I made this card using gorgeous Fredericka cd . I coloured the image with  water pencils and I made her a fascinator with tulle and glitter glue I used for her bag and shoes as well. The sentiment is from the same cd, the paper is from Sugarplum daisy , i added some gems and a dotted organza bow as a final touch


You have until 12 noon GMT on Sunday 5 May to enter and good luck!
..............................................................................

Tutorial - Flower Pegs

Welcome to the first Tutorial that we hope to bring you on a regular basis!  Today is a rather simple but pretty way of using pegs!

You will need the following:

Sugar Birdies cd
6 wooden pegs
Glue
Scissors
1 A4 sheet of thin white card
1 A4 sheet of clear vellum

From the Sugar Birdies cd, print off one of the flower sheets so that you get 4 sets on a sheet of A4 card.  Do the same with a sheet of clear vellum.  Put the card back through your printer and print a contrasting block colour on the reverse.


Cut out one set of the card flowers (6) and two sets of the vellum flowers (12)

Next, layer up the card and vellum flowers - keep the vellum layers at the top


Gently curl the petals to give them some dimension


And then glue to the pegs - make sure you don't glue the bit where the spring goes!

You could add a button to the centre and thread some twine through - I was lazy and couldn't find any black buttons!

Hope you liked the tutorial!

Birthdays with Bling Tutorial!!

Hello a very nervous Alethea here sharing with you my very first tutorial!!! I absolutely love creating cards, OTP things etc but to share with someone else how to do that step by step was a bit daunting for me... Not because it's hard but because I thought I had to come up with something unique that you had never learnt before!! Well if that is the case, then I have failed miserably because today I am going to share with you how I turned a boring old brown box into a gorgeous birthday present that I absolutely love!!! It is in fact my birthday today and this weeks challenge that will be going live soon was based around birthdays. I bought a watch earlier in the year for my boys to give me for my birthday and it didn't come in a box. I was happy with them just wrapping it but then came up with the idea of decorating it....  so join me in the steps to make this adorable gift box... I hope that inspires you to turn something blah to something WOW!!
This will be picture heavy but well worth reading till the bottom....

I started with this plain old boring box!!


I was just going to wrap paper around the box then decorate it with images but from previous experience knew that the paper just doesn't sit right so I decided to use a pink Adirondack Paint dabber (pink sherbert). I only inked the edges and the inside and flaps of the lid of the box.

I then printed out some digi papers from the Fredericka mini CD collection using my favourite colours!! I alternated the two colours putting green on the top and blue on the bottom. I just measured the box first then cut the squares slightly smally so I could see the inked edges!
Then I started decorating! I did each side separately so stuck the image down and added embellishments as I wasn't quite sure what I was going to put on each side!!! Polka Doodles have so many images on their CD collections so I looked through to see what I would like and found these adorable Winnie images on the Double Sprinkle of Kraft CD Rom. Again this image was cut out slightly smaller than the patterned paper so it looks like a border!! I then added a couple of rhinestones and kindyglitz. (keeping the birthdays with bling them in mind plus I love lots of sparkle)

While the first side was drying I found the perfect sentiment to finish the "Just to say' sentiment on the first image! This sentiment tag is also from the Double Sprinkle of Kraft CD Rom. I decided to leave the background border on this one. I stuck this tag down with foam tape for a bit of dimension. Once it was stuck down I decided I wanted to add the twine!! Obviously if you have planned what you are doing you would put the twine on before sticking the patterned paper down! Then I added the Doodle Dew Drops above the tag. The buttons that spell out mum were a bonus find in my button stash! Just perfect for this tag!! I also added kindyglitz to the little flowerpot.
For the third side I added another pre-coloured winnie image from the Double Sprinkle of Kraft CD Rom.  I didn't do much to this image as far as embellishments go, just went over the flowers with a glitter pen and added the one rhinestone!

For the final side I used another tag sentiment!! This one is stuck on with foam dots, then added kindyglitz for bling and more rhinestones!!
For the top I added another tag, twine and rhinestones!!! Remember it's all about the bling factor!!! Now of course you could decorate your gift box anyway yoou wanted, with the Polka Doodle CD Rom's the possibilities are endless!!!
Here are some more views of the gift box to see it altogether!!


Doesn't it look gorgeous!!! I perhaps should have painted the inside of the box, didn't think about it till I took this photo!!!
I hope that you have learnt something today and that my tutorial was clear!! I tend to babble a bit so I'm sorry about that!!
Be sure to stop by later for the latest challenge here at Polka Doodles!!
Until Next time... Enjoy
Alethea xx


Thursday, 25 April 2013

Life is much better ....

... when you are laughing.

I adore this phrase from the Studio 12 stamp range and can't stop using at the moment and have made another project using it.

OH recently received a package which had a stiff board enclosed (to protect the item) and it was too good to throw away, so I have turned in to a plaque. I have used a selection of Studio 12 stamps and the "must have" Stamp Slab range.


I didn't want to take up too much of yor time so have put the full details of how I made my plague on my blog HERE.


To check out the full Studio 12 stamp range, check out the Polka Doodles shop HERE and whilst you're there, check out the Stamp Slab range too.

Have a great day everyone,

Lou
x

Friday, 19 April 2013

Week 16 Challenge - New Home

Welcome to another Polkadoodle challenge!  From next week we will be bringing a new feature to the Polkadoodle and Studio 12 blog - each week a member of the Design Team will post a tutorial just before the challenge goes live and to make it easier for you to find them, there will be a new tab at the top of the page which will link directly to all our tutorials!  See how good we are to you!!  Watch out for the very first tutorial from next week!

Anyway!  Onto this weeks challenge!  But before we do that we need to announce the top three from Week 14 Challenge which was Pink and Brown.  Some really lovely creations were entered but there can only be three lucky winners and they are:

1st Place - Annie - you win an Emma Canning cd - Digi Stamp Heaven!  - please use the code PD1W1614 to claim your prize
2nd Place - Suzilou - you win an Emma Canning download - please use the code PD2W1614
3rd Place - Sharon G - you win an Emma Canning download - please use the code PD3W1614

Congratulations to you all.  Please email Nikky and don't forget to quote your winners code - we cannot release prizes without it!  Blinkies are in the sidebar for you to grab.

We have a few little rules which makes our life a lot easier when we come visiting your blog:

1.  Please follow the challenge theme!
2.  Only enter your creation into a maximum of 10 challenges including Polkadoodles
3.  Please link your blog post and not your blog address with the linky tool - this saves us from searching your blog for your entry
4.  And please, no back-linking to previous posts - these will be disregarded from our top three voting
5.  If you have word verification on your blog it really does slow us down when leaving comments - please consider turning off word verification especially as the comment moderation has a spam section.


Right, onto the challenge for this week and the theme is:

New Home

Please don't forget our rules and good luck - the challenge ends on Sunday 28 April at 12noon GMT! 


Ruth:  I decided not to make a card for this challenge and went for a welcome bottle theme!  I've made a posh bottle tag (I'm sure there is a proper description for it somewhere!) and used some Polkadoodle papers that I found in my stash and an image that I printed off nearly 4 years ago when Sugar Birdies was first released!  I've decoupaged the image, coloured the birdies and added stickles here and there.  And its all modeled on a bottle of bubble bath!


Lou: Here is my project using a plethera of Studio 12 stamps. I have stamped the images on to water colour card and then mounted on to felt. I then created a canvas with all the images, layering the houses up, creating clouds and paths from felt. Even the trees are stamped on to felt and then added ...


Lucy: For this challenge I decided to do a tag for my friend who has just moved. I sprayed the tag with Dylusion Inks and drew the border with marker pens. The image was stamped with the Be Neighbours clear stamps. The image, butterfly and flower were coloured with Pro Markers


Anjie: For this weeks challenge I have made a canvas. I have used images from the Studio 12 CD-rom.- Picknix Collection 1. I printed the background paper onto some printable canvas and glued it onto a cheap canvas I bought from one of those cheap shops. I then printed all the other elements onto printable canvas and glued them in place. I cut out the bunting and glued it on using silicone gel to give it a 3D effect.


JAN:  I made a 6x6" card for this week's challenge, using papers, image and lettering from the fabulous 'Sugarplum Daisy CD'. All layered up with a little kraft card and some polkadot organza ribbon.


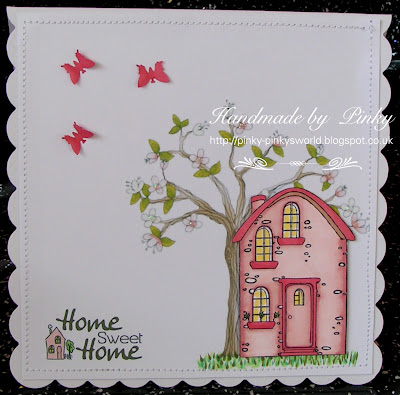
Pinky - For this challenge I used the Picknix Collection 1 cd for the tree and the sentiment. The little house is a stamp from the Stamp Doodles range. I coloured it with promarkers and flex markers along with the grass. I 3d the house in front of the tree, machine stitched round the edges and punched some butterflies and coloured them with matching promarkers. I finished with a little bit of glitter on the tree blossoms.


Lizzie - This week I made a Card and a box!


First the card ..... I used the Stampies from the CD All Around and Everywhere. Both the houses and tree Stampies. To make them large enough to make a card with I enlarged the view on them and used the printing option of current view.


I used double sided foam to give dimension, I also cut out doors and window boxes to help the dimension.
Of course I had to glitter it up using my Stickles ! The doors, roofs, window boxes and bits of the trees all got glittered ! The fence is a Marianne die. I basically layered all of these onto a rectangle card!

Secondly I made a box!  Again I used foam to layer up the images from the CD All Around and Everywhere, the Marianne die for the fence, a Martha Stewart Punch for the edge of the lid. The tag and leaves on top were both made using Marianne dies. Flowers are Prima with gems added !!


Margaret:  I made an easel card for the challenge using an image from Sugarplum daisy CD and cut 3 images and decoupaged up the house the trees are from All around and Everywhere  The bunting is made from papers from the same cd and cut using spellbinders dies


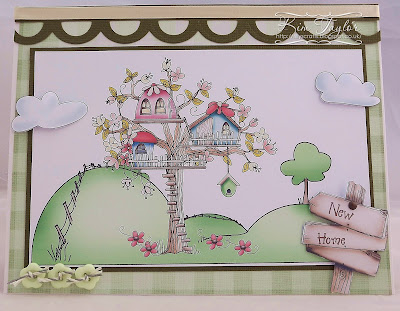
Kim - I made a 'New Home' card using a variety of images that I 'merged' together from Picknix 1 cd-rom, with the scenery, tree house and then flowers. I printed off clouds and added them as raised embellies, and the signpost (with added wording). The backing paper is also from the Picknix1 cd and then added a diecut edge and ribbon and buttons from stash


Shell-For my card this week I've used the row of house's from the All around and everywhere cd, the papers are from the gingerbread twist cd (I think) I already had it printed out in my pile of papers. I then added a bit of ribbon and lace with a few pearls to finish.


Clare - This week I chose to use images and sentiments from Studio 12 Picknix Collection 1 CD. I made a large 8x8 card for my Niece who has just moved into her first home. I have kept it fairly simple as I know my Niece will frame this and put on one of her walls!!!! I have layered the tree and bird houses for dimension. I have added little embellishments from my stash and finished the image off with Stickles Glitter Glue and gems on the flowers.


Good luck with the challenge - the rules are at the start of this post and the deadline is Sunday 28 April at 12noon GMT.


Thursday, 18 April 2013

Studio 12 Gift Set

Hello folks, it's Fliss here with you today with an idea for gift giving with a matching card perfect for a dear friend.
It's actually easier to make than it looks so read on to see how it came together.


Apart from the kraft dotty paper which I sneaked in from the Polka Doodles Double Sprinkle Of Kraft CD, all the elements and papers are from the Garden Collection on the Studio 12 Picknix Collection 1 CD.
I made the patchwork style paper which I used to decorate a plain kraft bag by resizing 3 of the green papers and 3 of the flowers to 5cm square in my photo editing software and then dropped them into a Word document in the design you can see. I printed it out on the antique beige old fashioned parchment card for a soft look then tore the edges and inked them with Antique Linen Distress ink before attaching to the bag.
I then printed out 2 of the yellow daisies, again resizing them and then fussy cut them out. I cut out a circle of the dotty paper and attached the daisy to this then punched a hole in the top and tied the tag to the bag with twine.
I then used a large frilly die to cut out my card blank from beige card and used the next size down to cut out the layers of green patterned paper. I printed the sentiment from the CD directly on to the kraft dotty paper and then die cut this and a further layer. I assembled them on the card blank and added the daisy at the top right side.

Just the thing to make for a special friend whether for a birthday or just to say thanks for being a friend.
Hugs, Fliss xx

Tuesday, 16 April 2013

Studio 12, Welcome...

Hello fellow crafters, today I have a piece of home decor for you all.  I found an inexpensive wooden sign while out shopping, just perfect for a touch of altering.  I painted the sign with acrylic paints and over stamped with Archival Inkpads.  While this dried I used Distress Inkpads and Distress Stains to make a wide variety of coloured inky backgrounds.  I stamped the house, trees, flowers and crowns from the Studio 12 range on the inky backgrounds.  I then over stamped the images with various text stamps from the same range. I cut all the images out and fixed them in place on the sign.  I found some chipboard letters amongst my stash to finish the sign off nicely.
A colourful and happy welcome into anyones home.  I hope you like my sign, I had a lot of fun making this.  Dont forget to check out the Polkadoodles shop for all your crafting needs.
Happy crafting to you all, Dee.

Friday, 12 April 2013

Week 15 Challenge - April Showers

Good morning everyone and welcome to a new challenge at Polka Doodles. We hope you're all having a good week and surviving the still rather chilly temperatures. It certainly doesn't feel like April in the UK, more like February!

Before we get to the challenge inspiration, we need to announce the winners from the Week 13 Paper Piecing - there were loads of fabulous entries as always which made it very hard for the DT but there can only be 3 winners and here they are:

1st Place - Debbie S - you win a  Sugar Birdies CD and please use the code PD1W1513 to claim your prize
2nd Place - Olivia - you win a Download and please use the code PD2W1513
3rd Place - Cass - you also win a Download and please use the code PD3W1513

Congratulations to you all.  Please email Nikky and don't forget to quote your winners code - we cannot release prizes without it! 

We have a few little rules which makes our life a lot easier when we come visiting your blog:

1.  Please follow the challenge theme!
2.  Only enter your creation into a maximum of 10 challenges including Polkadoodles
3.  Please link your blog post and not your blog address with the linky tool - this saves us from searching your blog for your entry
4.  And please, no back-linking to previous posts - these will be disregarded from our top three voting
5.  If you have word verification on your blog it really does slow us down when leaving comments - please consider turning off word verification especially as the comment moderation has a spam section.


This week's challenge is to make a project inspired by April Showers and as you'll see, the Design Team have cooked up some fabulous creations for you. There are some fantastic prizes this week too as the winner will receive the new Emma Canning CD and the 2 runners up an Emma Canning Download.

Astrid - This time I made a Gabble Box in pink. The digi is from the CD Love and Cherish. This cutie image has an umbrella and its raining lovely hearts. I coloured her with my copic markers. The paper is from the CD All Around and Everywhere. Flowers and lace are from my stash along with the pearls.


Fliss - I've made my card with this sweet digital image from Emma Canning called Rainy Days. You can buy her as a single image HERE or as part of the new Digistamp Heaven CD which has loads of Emma's images and some sentiments which you can find HERE (fabulous value too!). I printed her out on to thick cartridge paper and coloured her with a mix of Aquamarkers with added pencil detail. The papers are from the Cherryblossom Lane CD and I added loads of faux stitching detail and some inking for added definition. Cute, huh?


Asha - I made this card for my friend, who spent most of this year complaining about the weather. Here's a cheeky number for her birthday using this cute digi called Rainy Day by Emma Canning, which I coloured using alcohol markers. With an a blender pen I hit her brolly with great big blobs of rain! The patterned papers are from Love and Cherish and Sugar Birdies CDs. Some lace and bling complete this card.


Karon - I too have used the Emma Canning image called Rainy Days - great minds think alike :-)  My striped paper is from the new Frederika CD, the spotted paper and sentiment are both from the Double Sprinkle of Kraft CD, and the clouds are from the Studio 12 CD - Picknix Collection 1.  I inked all the layers with a blue ink, including the clouds.  Coloured the image with alcohol markers.


Miria Another quick and easy card! I used a coloured digi from cd Cherryblossom Lane, the paper and bumting are from the same cd. I die cut an aperture and adhered acetate to it. The sentiment is from Candy Doodles Collectors' Edition; I added buttons and washi tape to embellish.


Sally - Hi there.  This weeks challenge I have used an image from the Sugar Plum Daisy CD Rom
I mounted her on some red cardstock and inked the edges with a black Promarker. I printed out two background papers from the Sugar Plum Daisy CD Rom and mounted the blue on red and edged the red paper in black. Added some ladybirds, sentiment (also from the CD Rom) and a swirly die cut. This little card would brighten any rainy day.


Alethea - I've gotta say, this turned out better than I had imagined!! I used papers from the All Around and Everywhere CD. I used a pre-coloured image of Noah from the Cherry Blossom Lane CD Rom and I added some sparkle to his umbrella. I then added the pre-coloured rainbow from the Studio 12 CD Rom - Picknix Collection 1  and the sentiment is from Double Sprinkle of Kraft CD. To finish off the card I added the rik rak and buttons!!


Monica - I really enjoyed this weeks challenge. I decided to use an umbrella and make it the highest point of my card, put all the attention on it. And I think I got it. Take a look. ;-) For this card I just used simple papers (gray, black and white) and let all the glamour to the umbrella, in which I used the paper from the Cherry Blossom Lane CD Rom. And to complete the card, I wrote the words "now and forever" as a raindrops. Have a great week pals! :-)


Lidia - This time I´ve made my Card with a digital image and sentiment from the brand new Federica CD the papers are from Cherry Blossom Lane CD Rom finally I added a few drops onto the base paper of my card with Glossy Accents.


Good luck with the challenge - closing date is Sunday 21 April at 12noon GMT.