Showing posts with label Studio 12. Show all posts

Thursday, 21 November 2013

A giftcard holder

Good morning all, Miria here with a new project for Studio 12.
Christmas is just around the corner and I created a card to hold a gift card, of course you can also use it for bithdays or other celebrations.
I used papers from the so inspirational cd Picknix Collection 2 Gingerbread Twist - btw it's on offer on the shop, don't miss the chance to grab one!
I decorated the front ...


... and made a pocket inside to hold the card ...


I used my beloved tickets from the same cd and mesh and pearls to embellish.


Hope you liked it, have a nice day, Miria

Thursday, 7 November 2013

Incredible You

Hi everyone it's Dee here with today's Studio 12 post.  It was my partners birthday last week and I wanted to make him a card that wasn't too slushy but said what I thought of him (only good things).  I looked through my rather large stamp collection but nothing jumped out at me till I got to the Polkadoodles Studio 12 stamps, and there I found the perfect stamps for what I wanted.  The circle and heart stamps are firm favourites of mine and the sentiment was just perfect because he is incredible (well most of the time lol).  I also used 2 of the faux stitching stamps and the distressed dogs-tooth stamp which are very useful stamps indeedy.  Red, black and white inkpads with some white embossing powder and kraft card and voila, a special card is created
I hope you like my card, don't forget to come back tomorrow for the Friday challenge and lots of gorgeous inspiration from the Polkadoodles design team.

Tuesday, 29 October 2013

Clean and Simple at Studio 12

Hi there crafters,

JAN here today to show you a really quick 'Clean and Simple' card using two stamps from the fabulous Studio 12 range.  I do tend to spend forever on my cards, but occasionally we all need to make a 'quickie' at the last minute - so here's what I made ...


I used the leaf stamp from the 'Shabby Owl Blossom' set and stamped the image three times in black ink, inverting the middle image.  I added a little colour to the leaves with my Promarkers and drew a doodled border to frame them.  I stamped out the sentiment from the 'Leave a Little Sparkle' set and added a few adhesive gems.  I mounted the whole thing on green pearlised cardstock before adding to my card base.

Quick and simple! What do you think?

Hugz, Jan xx


Thursday, 19 September 2013

Home Sweet Home

Good morning,

JAN here today with another little make using the STUDIO 12  products from Polkadoodles.  I used a combination of CD images with acrylic stamps to make a wall plaque ...


I couldn't resist the cute little house from the 'House of Hearts' collection and I masked it and added a few other stamps to make a little scene on a piece of craft card.  I stamped the house again on book paper and paper pieced it over the top of the first stamped image.  I then coloured the whole thing with my Promarkers. 

The background is one flat layer, put together on my computer using a backing paper from the 'Picknix 2 - Gingerbread Twist CD'.  The gorgeous frame, piece of lace and the sentiment are from the 'Welcome Home' section of the 'Picknix 1 CD'.  

The whole thing is mounted on kraft card with a piece of twine added to hang it with.  Hope you like it.

Ooo, and don't forget we have a brand new challenge here tomorrow and here's a little sneaky peek (but don't tell the boss!).


Enjoy your day,
Hugz, Jan xx


Tuesday, 17 September 2013

A bit of Upcycling

Hello everyone Dee here with today's Studio 12 post.  I spent a while mulling over what to make and what to use.  With so many Studio 12 stamps to choose from I was rather spoilt for choice, but in the end I couldn't resist using the Polkadoodles Owl stamp in conjunction with some papers from the Picknix Gingerbread Twist CD.   I had an old paper bag from a high street store that was in my 'useful things to alter box'.  I covered the front with the papers and blended tea dye distress ink round the edges.  I paper pieced the stamp and added a few images from the CD to finish the bag off.
Check back Thursday and Friday for more fabulous creative inspiration from the design team.

Saturday, 14 September 2013

Follow Your Heart

Hello and good morning from a very wet Yorkshire,

JAN here today with a little make using some more of the gorgeous Studio 12 stamps. I adore the little 'heart' which can be found on the 'Distressed Zig Zag' set which you can buy in our on-line store HERE.

Here's what I made ...


The artwork measures 8.5 cm square and is framed with a 6x6" mount, but you could just as easily recreate this on a mini canvas. 

I began with a piece of white cardstock which I covered with distress inks in Mustard Seed and Peacock Feathers. Then I used a variety of little stamps from the same set to over stamp using the same inks to create a background (the text stamp is from my own stash).  I stamped the hearts directly onto the card and then stamped again on a scrap of book paper, cut them out and coloured them with the same distress inks before embossing the front one with clear powder. The sentiment is printed on my pc and I added a little doodled line around the edge.

Don't forget our new challenge went live yesterday - so if you haven't seen it yet just click HERE.

Have a great weekend,
Hugz, Jan xx

Sunday, 8 September 2013

Studio 12 wall hanger

Good morning Blog land, it Anjie here with a Studio 12 post today.
I'm just loving all of the Studio 12 stamps that you can find here, they are so versatile and can be used for lots of different things. Here is my project.
I've used stamps from the Leave a Little Sparkle , Chimney House , Shabby Owl Blossom  and Vintage Ephemera  sets. I've used a distress ink pad to colour the edges of the panels and also the same ink pad to colour all the images.

Tuesday, 3 September 2013

Studio 12 - Acrilic Post it Holder!

Hello everyone! Patty here with a new project for Studio 12.
I wanted to make a gift for a friends who's birthday is coming up, and she is a crazy with all personalized items.  I remembered that she loves post its and have one in every color so I decide to make her a Personalized Acrilic Post It Holder.

for my creations I used papers from All Sew Up from Studio 12 Picnix Collection1.  Is so easy to do, here's all that you need: papers, post its, ink, acrilic frame any size you like, scissors and some embellishments.

Here's how to do it:
Cut your Designer paper 5 x 3 1/2 that will be your background and put it as a photo on your acrilic holder, then take a piece 5 x 2 of the contrast paper that matches your bacground and die cut a piece as a flourish tag with a piece of CS of your choices cut the letter (my case I used pink to cut letter G). When you have all cut out and ready, glue tag and letter to the front of the acrilic frame and embellish it as desire. On my holder I added 2 Doodle Dewdrops on the top.
 And voila! you have yourself a lovely Personalized Acrilic Post It Holder, a great gift to anyone!!
I had so much fun making my Holder and wish that you do too!!

You can find all of Studio 12 Collections HERE.

Thanks for stopping by!
Blessings!!

Patty


Tuesday, 27 August 2013

What if the Trees weren't Green!

Good morning crafty friends,

I have a project to show you today using some of the Studio 12 stamp range, which is now back in stock. I have been playing in my art journal with some inks and a few of the stamps. Here's what I made ...


Stamps used include:

Dreamy Trees (I adore these!)
Distressed Zig Zags (around the edges)
Shabby Owl Blossom (for the leaves)

The background was coloured using distress stains, then I added a little interest to the background using a stencil, a bottle lid and a little white acrylic paint. I stamped the border and the leaves using black archival ink and stamped the trees onto book pages before colouring with my Promarkers. The wording was printed on my pc.

Why not pop over to the Polkadoodles store now and order your stamps - I would love to see your creations.

Hugz, Jan xx

Tuesday, 20 August 2013

Studio 12 Key hook

Hello everyone, it's Anjie here with a Studio 12 post.

I have a huge pile of items waiting to be altered in some way or another so thought I would use one of them for todays post.


It started out life as a plain MDF key which I have made into a key hook.

The paper is from the Studio 12 CD-rom Picknix Collection 1. The flowers are made from the same paper. I have slightly distressed the edges and ink them with a distress ink, and have done the same with the flowers. I threaded a string of beads to add around the circular hole, and added some Doodles Dew Drops, and a die cut butterfly. The keys are from a broken handbag charm.

Thursday, 15 August 2013

Life is much better when you're laughing

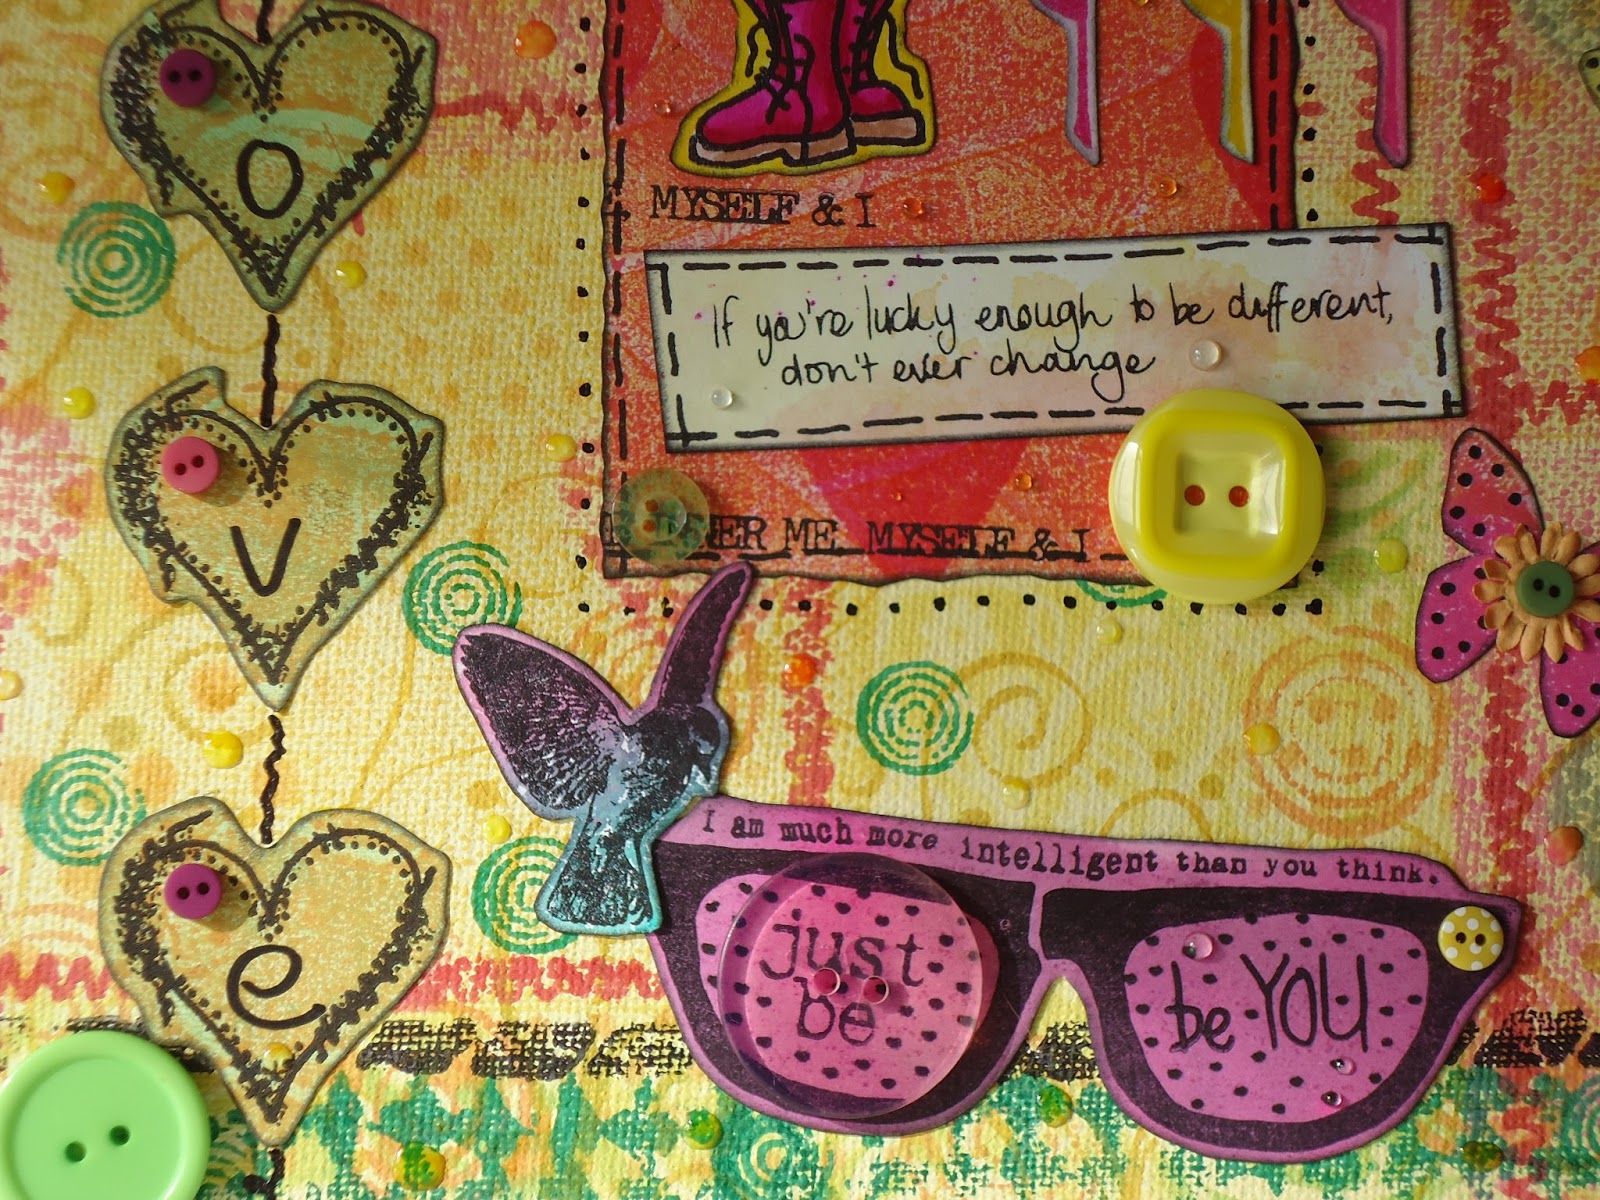
Hello all Dee here with today's Studio 12 project.  This is something I did quite some time ago now but I've been holding off till the stamps were back in stock.  Well they are now in stock at last so here is my colourful 12x12 canvas.  There's lots of layers of paint and ink and I used stamps and masks on the canvas to give an overall riot of colour.  These are not my usual colours it has to be said, I always feel far more at home with cool blues and purples, but I wanted this to be happy and to make you smile when you looked at it, hopefully I have achieved that.

All the stamps are Polkadoodles Studio 12 and Susan K Weckesser at Studio 12. I had so much fun making this so I hope you all like it.


Thursday, 18 July 2013

Love and hugs

Hi all, it's Dee here with today's post for Studio 12. I used an image from the new mini CD Angelberry Christmas and the papers are from The Studio 12 Gingerbread twist CD.  I printed the image onto vellum, then coloured it in with colouring pencils on the back, which gives it a lovely muted effect.  I inked the edges with a brown chalk ink pad and fixed the vellum panel in place with some small heart brads.
Don't forget to check back tomorrow for the weekly Polka Doodles challenge.

Friday, 5 July 2013

Going Crackers at Studio 12 !


Lizzie here !! 
Going crackers !!! Lol I already have !!
Anyway ........
Its my turn at Studio 12 to do a post!
I thought I would make some Christmas crackers !!
I used the Gingerbread Twist CD.
All the papers and Images are from the CD.

The white star and tree are Marianne Dies glittered 
up with Stickles to make them pop !

Hope You like them !!

Tuesday, 2 July 2013

Christmas in July with Studio 12

Hi, Miria here with a new project for Studio 12.
It's a quick and easy Christmas card: it's only 175 days to the Season, it's time to start making cards :)
The image I used a coloured stampie I've never used before, a cute stocking with tag. As the papers - I do love them - and tickets it is from Picknix collection 2 Gingerbread twist. I just added two paper clips embellished with some ribbon.


Hope you liked it
Hugs from Italy, Miria

Sunday, 23 June 2013

Flowers Feed The Soul

Good Morning,

I do hope that everyone is having a great weekend. JAN here today to show you a little something using the Picknix 1 CD. I must admit I had a little panic when I realised it was my turn to post and the colour cartridge had ran out in my printer! So into my scraps I went and this is what I came up with ...


I printed the sentiment onto a piece of white card then added the little hexagons which I stamped and cut out of scraps of paper left over from a previous project! A little bit of distress ink and some added flowers to finish off. A really quick and simple card!

Hugz, Jan xx

Thursday, 20 June 2013

Purple dreams

Hello everyone It's Dee here with a dream box.  Well technically its not a box but a set of drawers but Dreams drawers just doesn't sound as good does it?  It started life as a paper mache piece, I painted it with blue, purple, pearl and green metallic acrylic paints and then over stamped using Staz-on inks in blues and purple.  Now I'm likely to get my wrists slapped by the boss lady, but I've been waiting to show you this for months and I just cant wait any longer, so if you keep quiet about it she may not notice!  The stamps I used are all Studio 12 stamps and I'm really, really sorry for teasing you all as they are out of stock at the moment, but they will be back soon, so keep checking for them.  They are perfect for just about any projects you'd want to do, journaling and altered art especially.  Which reminds me, have you seen the gorgeous stash in the Alterables section of the Polkadoodles shop, I have my eye on the cute house and the birdhouse, they are adorable and I have it all planned out in my head what I'll do with them.
I hope you can forgive me for teasing you, but I have been dieing to show it to you.

Tuesday, 18 June 2013

Craft Room Sign

Over the weekend i had a sort out of my craft stash, binned loads of odds & ends (shock horror), got some bist to sell and found some stuff i forgot about!! It was rather productive just seemed to take agessss. I thought well i need a new sign for my craft area, technically i don't have a craft room more half the lounge just craft area didn't sound very good so i still put craft room in hope one day i'll have one ;) 
All the elements are from the gorgeous Studio 12 Picknix Vol 1 CD available from Polka Doodles. They are from the All Sewn Up & Welcome Home Collections. Everything was arranged in Craft Artist - i just LOVE this chalkboard it's rather ace! You could of course 3d many of the elements too.

Kitty xx

Tuesday, 11 June 2013

One For Dad With Studio 12

Hello there, guess who only remembered she was supposed to be doing her Studio 12 post at lunchtime lol.
I immediately grabbed by Studio 12 scraps box to see what I could find and with Fathers Day looming fast here in the UK, have rustled up a very quick card with men in mind.


All I did was tear some scraps of paper - the gingery coloured polka dot paper is from the Gingerbread Twist CD and the distressed harlequin design from the All Sewn Up Collection of the Picknix Collection 1 CD - and added these to a kraft card blank with a scrap of vintage music score.
I then added the gorgeous robin digital image from the Gingerbread Twist CD and some text made with my Dymo machine and black tape. Done!

The card also fits in nicely with our challenge this week which is to make a Birthday Card With Scraps so hope to see you if you haven't already entered.

Hugs, Fliss xx

Thursday, 6 June 2013

Studio 12 - Tile Coasters


Hi Lizzie here again !!!
I thought I would make some coasters out of some tiles
my friend had left over from having her kitchen done.

Wow these are so easy to make ......
BUT you need a lot of patience, and the right tools.
They are not an instant make !

All the images are made from that CD.
I made up the image of the watering can and tree
in my graphics program using elements from the cd.
Words are from the sentiments on the CD too.
The pink flowers are one of the papers !


Here's how to make them.

1. Spray your inkjet printed image with a sealant so the image doesn't run.
If you have a laser printer you don't need to do this.
It will need two coatings but it is important you let each one dry.


Don't spray close to the paper/card as you get black marks
(I learnt the hard way in that!)

2. Make sure your tile is clean and dry.

3 Cut your sealed image to size.

4. Use a flat foam brush to paint Modge Podge on the tile.
Be careful to not overload it as this will cause air pockets.

5. Place your image on the tile and press down securely 
So all edges and corners are not lifted up.
(I used another bit of card to press on top so I didn't damage the image)
Important, let it dry! Don't miss this stage out as I found when I did the final stage didn't work
As I got enamel under my image.......
Wash your glue brush too.

6. Paint a Layer of Modge Podge over the image, 
a thin layer is better, keeping all brush strokes in one direction.
You will see them slightly when dry.
You can create a nice effect of hatching if you alternate vertical
                                                     and horizontal tho! Let it dry!

Repeat so you have at least three layers of Modge Podge on top of your image.
Leave for at least 24hrs before the next stage.
I left it for 48 hrs.

7. Spray your tiles with clear enamel spray.
Again thin layers are better, if you put too much on
It will make a mark, stain .. Not sure what to call it.
Let dry as per instructions on the can.
Mine was to dry and spray within an hour
or leave it then for 24 before spraying another layer.
Spray at least three layers.

Your coasters now need to be left for at least 48 hrs.
I used some furniture sticky pads under my tiles
so that they wouldn't scratch any furniture, you could use cork also.
Modge podge takes 4 weeks to cure but I found by using the enamel
I could put a hot cup on it without it marking or sticking in 48 hrs.
But after 4 weeks you can feel the difference, leave if possible.
They are able to take a cold glass and deal with the condensation too.
Wipe dry don't put in a dishwasher.

Hope you like them !

Thursday, 30 May 2013

Studio 12 - multiple folds

Hi everyone, Lou here with a Studio 12 project using the fabby Picknix Vol 1 CD ... which is on SALE at the moment over at the Polka Doodles shop.


I decided to make a card using multiple folds which was secured by ribbon but could also stand independently with just the front fold. I know, it sounds bizarre but really does work .... promise! Please note that this is quite a picture heavy post.

The front of my card which the ribbon bow ...

 
The inside showing the 1st sentiment panel


My card opened showing all the folds and panels.


I have used Serif Craft Artist to create my sentiment frames but all the other elements have been printed from the CD. What I nornmally do is either open a word document and put all my images on to one page (sizing them at the same time) or alternatively use Craft Artist to do the same thing. You can export any of your finished pages from Craft Artisit in to either a JPG or PDF format for future use so you don't have to then keep oopening Craft Artist to action your designs.

To see more of my card, there are additional photos on my blog which can be found HERE.

Have a great Sunday everyone,

Lou
x