Showing posts with label Studio 12 Picknix. Show all posts

Friday, 26 February 2016

Week 8 - Polkadoodles Crafting Challenge - Tic Tac Toe

Shop on Etsy

--------------------------------------------------------------


Happy Friday! 
We have a new challenge for you this fortnight - another favourite for everyone....
TIC TAC TOE
pick three items from the table below -  Which will you choose?!

Don't forget, you do not need to use Polkadoodles products to enter our challenges.
The few rules we do have are over there in the side bar -----> Please remember only 2 entries per person. You have until Noon, GMT, Friday 11th March to enter.

Our Random Winner of this challenge will receive a 
$10 voucher to the Polkadoodles download store.

Did you all see Nikky on Create and Craft TV earlier in the week. If you missed it you can still watch online HERE and see the latest releases and some lovely demo's... 
Work & Play 12 is out...
Work & Play 12 Collection Big Kahuna bundle
and the cutest little lady bug Lily Bug Love collection.
You can get the full collections or even the fabulous smaller bundles they are amazing and contain so much!
If you havent joined us on our Facebook group POLKADOODLES CRAFTING yet make sure you come over and join us - you'll get all the heads up on our weekly special offers and launch party deals, so head over and join in the fun with us all! 

Let's see what the Design Team have for your inspiration this week...

Ria - For my Tic Tac Toe card I used this cute Lily Bug Love that I coloured with warm grey alcohol markers only. (CHECK WINGS).  I used the black checkered paper from the Lily bug Love Collection and the Hi embellishment (CHECK Sentiment) that I fuzzy cut. and to check off Nature I used a cutting die with butterflies. no idea which brand it is as I have had it for ages and I need a good Die organizing system hahahahhaha as now I have NONE :)


 Jenny - Tic Tac Toe is the challenge and I have used the new Sticks and Bones collection for my card. I have made the entire card from bits left over from other projects, the topper is from a design sheet and backing papers always have bits left that usually get wasted because you put them to one side and they end up getting creased. My line of choice is sentiment, lace and flower, I love the circular sentiments and now I have a die which is the right size it makes using them a breeze.


Karon - I used the third column for my Tic Tac Toe card, Sentiment, Lace and Flower.  Returning to an older collection is always good fun, you never know what you might find. So, everything on my card is from the All Sewn Up collection, you can get it as a small bundle on it's own or you can buy the full bundle Studio 12 Picknix 1 - which this collection is part of.  All the edges of all the layers were inked and some were place on foam tape to add some dimension.


Jackie - I have chosen to use wings, polka dots and charms in my take of the tic-tac-toe challenge. The Serenity Dancing digi I have used is available on it's own or in the  Serenity collection. The gorgeous range of papers I have used are also in the collection.  Details on my blog for colouring.


Scatty Jan - For this weeks make I used the wonderful Lily Bug Love  collection and for my Tic-Tac- Toe, I used Wings, Nature and Sentiment. I love all the pretty papers, such a beautiful girly collection that would fit many occasions. I made a cute little box cut on  my portrait, which holds a few chocolates ...yummmy!! How cute are those bugs!!


Aunty Sue - Well for my Tic Tac Toe I have completed all the boxes except the animal. I have made a bag using our New Lily Bug Love Collection. Everything except the lace and charms are available in the collection Here 


Melanie Smith - here using the beautiful Serenity Princess digital stamp. For my Tic Tac Toe I have used "Wings, Nature, and a Sentiment"

Fabulous inspiration.  Now it's over to you!  Lucky Green challenge winner and top 3 will be announced next Friday.

Can't wait to see your fabulous creations.
We love coming by to visit your blogs. Remember only 2 entries per person please.
Have a great week!

Mister Linky's Magical Widgets -- Thumb-Linky widget will appear right here!
This preview will disappear when the widget is displayed on your site.
If this widget does not appear, click here to display it.

Friday, 13 March 2015

Week 11 - Birthdays - Polkadoodles Challenge

Happy Friday, one and all!
Have you all had a great week?

We hope you have all been going googly eyed at the latest new release: 

** Eden CD - Digital Crafting Collection

Beautiful, stunning, gorgeous, collection of amazingness!
You can WIN this beautiful collection this week! 
Whoop Whoop!

We have all been busy crafting away to bring you some wonderful inpsiration
for our new challenge this week.

The theme is 
BIRTHDAYS
Now everyone, will have a creation for this one, after all
every day it's someones birthday, isn't it!
Remember, you do not have to use Polkadoodles products to enter our challenges.
You have until 12 noon. GMT, Friday 27th March to enter.


The Random Winner of this challenge will receive a download bundle of the whole Eden collection above! WOW!

We would also like to take this moment to introduce and welcome
a new member to our fabulous Design Team


If you would like to go check out her blog, just click on her name.
She has jumped straight in this week to join us and you can see her creation below
amongst the DT inspiration for you this week.


Now let's see what the Design Team have been up to.

Scatty Jan For my Birthday card I have used the wonderful Cherryblossom lane CD such a fantastic collection full to bursting with oodles of papers, Characters, embellies etc! Everything on my card is from the collection, all that was added were a few pearls to the flower centers to finish - This collection is suitable for so many occasions, Easter, Birthdays, Weddings, Get Well to name a few.The two Characters that I have used are called Party and are also available as a digi stamp that you can find here . Lots more piccys on my blog xx


Asha - I made a birthday card for my 8 year old nephew using the marvellous design sheet from Work & Play 8 Music. I didn't add any embellishments. Instead, I filled the card with bits and pieces form this sheet to create a fun, bright and LOUD card that will appeal to any young man.


Karon - Thought I would make a masculine card ready for hubby's birthday in May.  Using the fabulous Winston Delux Papercrafting CD collection.  This is a wonderful collection and if you like Kraft you will love this!  Lots of lovely scrumptious papers, and of course this wonderful ted!  I used one of the design sheets, and added some lovely papers, all from this CD.  Layering him up and adding a little cotton for his fishing rod, and some glossy accents to the fish bait.


Christine  I used the wonderful Work and Play 9 Love and Kisses Collection.  I used the Love and Kisses Digi and I coloured her with Spectrum Noir Markers and Coloured Pencils.  The carriage comes with the set, I used the Print and Cut feature on  my Silhouette for it.  I also used one of the cut files that came  with the collection also.  Put some finishing touches with some flowers and punched butterflies.


Lou: I created a trio of cards this week using the Octavia CD/download and have challenged myself to use only the papers and embellies you find on the CD/download. All the cards are using the same pieces but each different. Not bad with just 3 papers and a page full of embellishments. More photos can be found on my blog ...


Penny: For my birthday card I used the beautiful Amelia with elements from Work and Play Collection 8.   The card started with the frame which I layered five deep to add some depth.  I used the print and cut feature on my Sil Cameo for Amelia, the paper layers and the frame, as well as that cute little bow, with some simple distress ink on the edges.   More details can be found on my blog.


Agnieszka - hello :) Today I want to share you my birthday card.  I  used a digi  image and flowery paper from Work & Play 9 Love & Kisses - Full Download Bundle.   I colored it with Promarkers,  I added a ballons and heart banner, a few flowers, crystals and dies cut - my card is ready, hugs.


Melanie - For my birthday card I decided take some lovely floral letters from the Picknix CD. I printed them out twice - once onto plain paper and again a thicker cardstock - then carefully hand-cut each letter. I arranged the paper letters overlapping onto a watercoloured card blank, then added my thicker cardstock letters on top using 3D foam pads for dimension. A stamped 'happy', some thin satin ribbon and pretty pastel flowers finished my design. I hope you like it!


Jane - Still dragging the chain but here is my Birthday inspiration using my favourite medium Copic Markers. I have used one of the images from Work and Play 8, Music.


Fabulous creations by the Design Team and a great mix
of different collections being used.

Our winner and Top 3 for our Ribbons and Lace challenge
will be announced next Friday.

Looking forward to seeing all your wonderful creations again and thanks for joining us this week!

Mister Linky's Magical Widgets -- Thumb-Linky widget will appear right here!
This preview will disappear when the widget is displayed on your site.
If this widget does not appear, click here to display it.

Thursday, 19 December 2013

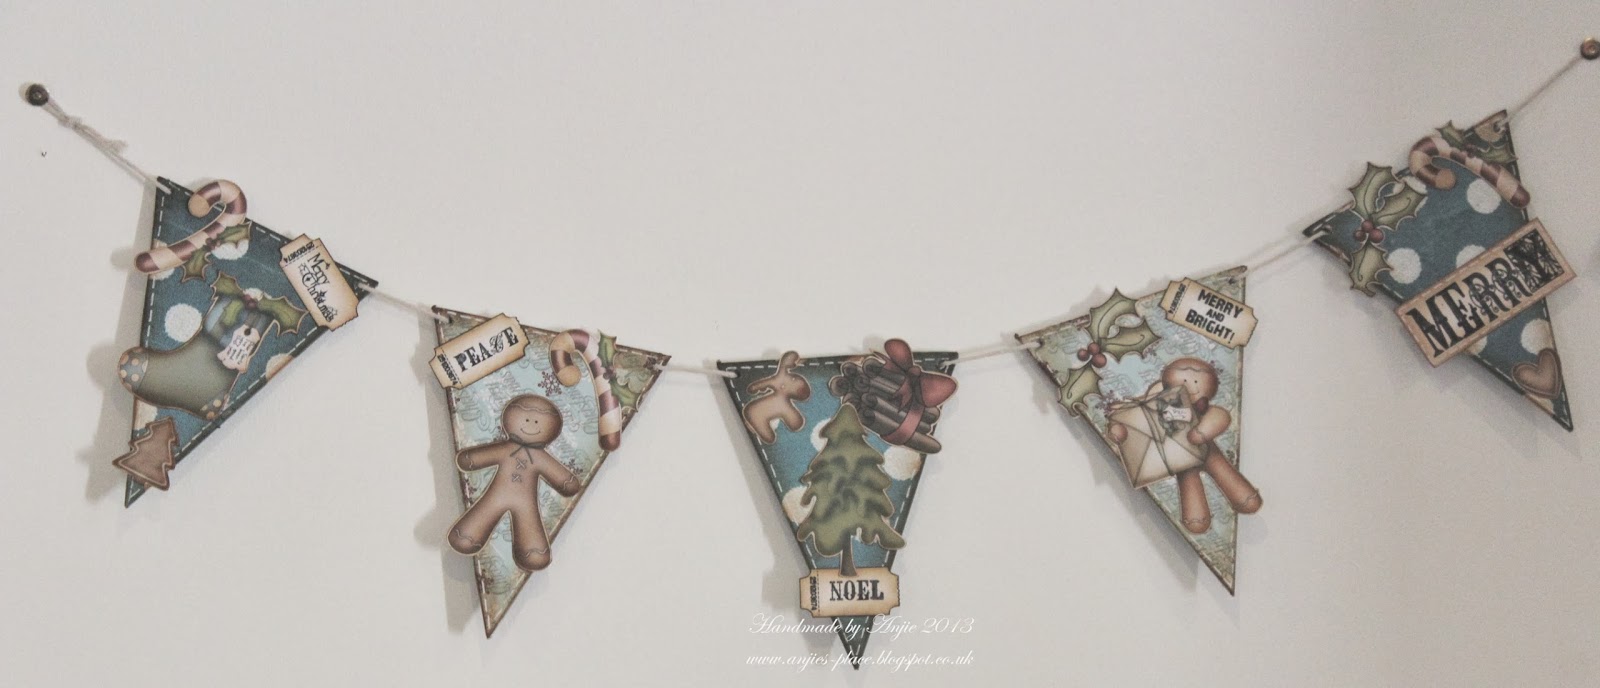
Studio 12 Christmas bunting

Good morning it's Anjie here today with a Studio 12 project.
I've been really looking forward to putting this up in the house as I love it so much. Is that vain to like your own make? lol
 This started out life as plain MDF triangles from the MDF man. I knew straight away what I wanted to do with it. All the papers and embellishments are from the fabulous Studio 12 CD-rom Picknix Collection 2 Gingerbread Twist. I glued all the papers on and used a distress ink around the edges to give it an aged look. I then added some faux stitching with a white opaque pen. I then cut out all the embellishments and also aged them with the distress ink and glued in place. I threaded string through to hang it as I thought ribbon would look odd with it having an aged look. It is now in pride of place behind the bar in our party room. Here are a few close up shots.

I will treasure this and it will be brought out every year.

Thursday, 24 October 2013

Studio 12: A Vintage Christmas Tag

Hi, Miria here with a new creation for Studio 12.
Christmas is just around the corner so I decided to make a tag using the cd Picknix Collection 2 Gingerbread Twist  -  it's so inspirational  - and I went vintage.
I recycled some corrugated cardboard from a packaging; I dabbed it with white acrylic paint
I printed the coloured images I chose, cut them out , dabbed them as well and finally I layered them on the tag.
I added two sentiment tickets from the same cd: I'm in love with them :) and here it is ...


Hope you liked it.
Don't forget you can find two challenges on the blog, our traditional Polka Doddles on Friday and our new one, Digi Choosday on Tuesday, on this very blog.
Don't miss the Wicked Wednesday promotion on the shop here.
Hugs from Italy, Miria.

Tuesday, 3 September 2013

Studio 12 - Acrilic Post it Holder!

Hello everyone! Patty here with a new project for Studio 12.
I wanted to make a gift for a friends who's birthday is coming up, and she is a crazy with all personalized items.  I remembered that she loves post its and have one in every color so I decide to make her a Personalized Acrilic Post It Holder.

for my creations I used papers from All Sew Up from Studio 12 Picnix Collection1.  Is so easy to do, here's all that you need: papers, post its, ink, acrilic frame any size you like, scissors and some embellishments.

Here's how to do it:
Cut your Designer paper 5 x 3 1/2 that will be your background and put it as a photo on your acrilic holder, then take a piece 5 x 2 of the contrast paper that matches your bacground and die cut a piece as a flourish tag with a piece of CS of your choices cut the letter (my case I used pink to cut letter G). When you have all cut out and ready, glue tag and letter to the front of the acrilic frame and embellish it as desire. On my holder I added 2 Doodle Dewdrops on the top.
 And voila! you have yourself a lovely Personalized Acrilic Post It Holder, a great gift to anyone!!
I had so much fun making my Holder and wish that you do too!!

You can find all of Studio 12 Collections HERE.

Thanks for stopping by!
Blessings!!

Patty


Thursday, 29 August 2013

Studio 12 - A Vintage Ephemera tag

Hi, folks. Miria here with a new project for Studio 12.
Our lovely boss Nicky gave me the chance to use new Studio 12 stamps and it was love at first sight.

For my creation I used a manila tag; I coloured it with Distress inkpads and sprayed with water, then adhered some hand torn patterned paper from cds Pretty Sweet and Picknx Collection 1: I sprayd them as well to give a faded look..
I used the stamps House of possibility  and Vintage Ephemera. The sentiment is from Picknx Collection 1 again, I distressed it. I added two small charms to match the stamped key and ribbon and lace.


I think it could be perfect to celebrate a new house.
I had great fun in making my project and I'm sure you'll love these stamps, you too.
You can find the whole collection here
Thank you for your attention.
Hugs, Miria

Sunday, 16 June 2013

Studio 12: Art Journaling Page with Picknix1

Hi folks. Miria here with a new project for Studio 12.
I gave a go to an Art Journaling Page! It's a long time I would like to try it and this is my creation...


 As you can see, I used image, sentiments and tag from cd Studio 12 Picknix Collection 1. I coloured the doll with pencils,  I sprayed the background with Dylusion Ink and doddled with a Zig Millenium pen: I started cautiously but then I couldn't stop scribbling , I had so much fun!
Some more details ...


Hope you liked it. Have a nice and creative Sunday, Miria

Thursday, 23 May 2013

Tag your greeting

Hello everyone its Dee here with the post for today.  I have a lovely card for you made with the Studio 12 Picknix 1 CD.  The papers and elements are all from the Welcome Home collection.  The only bits I've added are cardstock, garden twine and small paper roses, and I inked all the edges with a Tea Dye Distress inkpad.  The ribbon and string running across the backing paper are a part of the paper, I simply cut along the edge of the ribbon with a craft knife and slipped my topper under it to make it look like its a separate piece.
As an extra I have a card made with the Polkadoodles Missy stamp set.  Nikky has put this set down to a very special price for a limited time so check it out, it really is a silly price so grab it while you can. The papers are from the Cherry Blossom Lane CD.

Tomorrow sees the new challenge post so make sure you check out all the wonderful makes from the design team.

Sunday, 19 May 2013

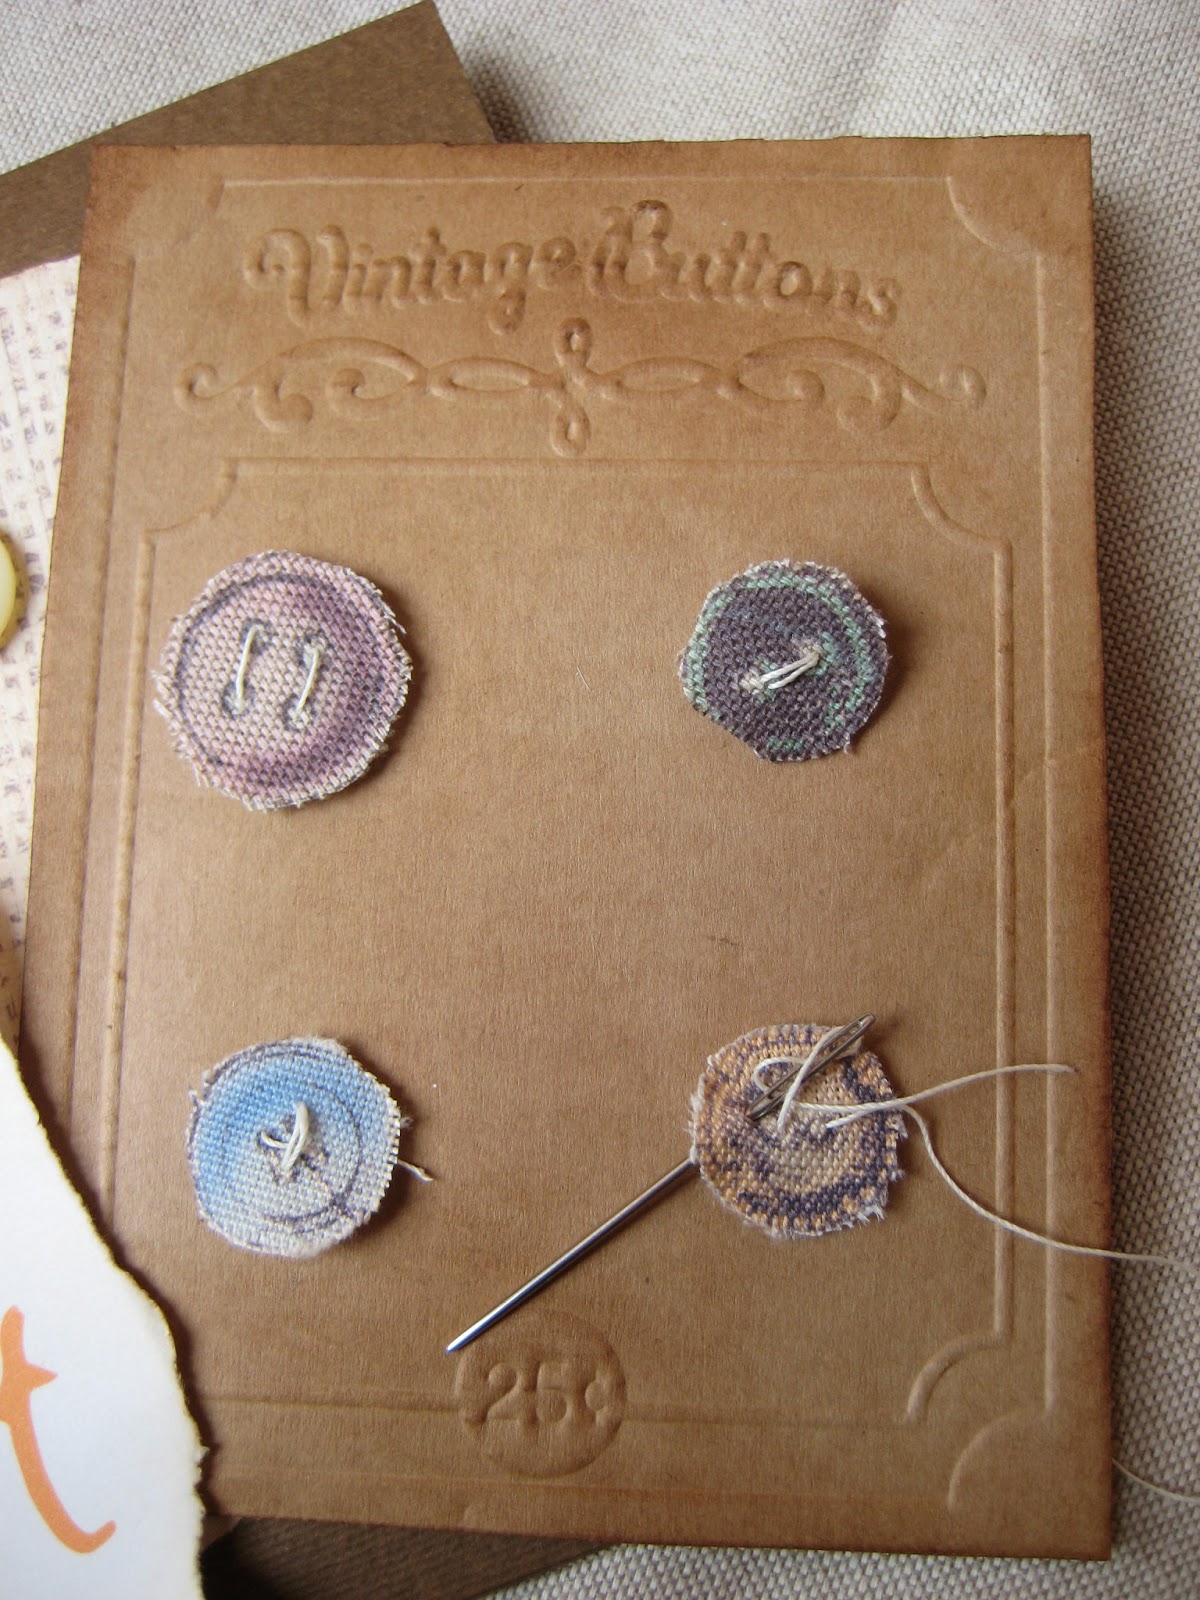
Studio 12: You are Sew Sweet!

Hi, Miria here. This is my new project for Studio 12. I made a card using images, paper and sentiment from cd Picknix Collection 1.
Just for a change, I printed buttons on fabric with freezer paper, then I cut them out and adhere to an embossed and distressed card.


 I made a background with the papers, added the sentiment, some buttons, a die cut heart, a needle and a pin.
 

Here's a closer view ...

Hope you like it. Wishing you a very creative Sunday, Miria.

Tuesday, 7 May 2013

Studio 12 tags

Today I want to share with you some gift tags I have made.
All the papers and embellishments are from the Studio 12 CD-rom...Picknix Collection 1.
I cut the bases out of Kraft card. I cut some paper into strips and cut out all the embellishments and ink around the edges with distress ink. I glued the paper to the tags and added some faux stitching. I then added all the embellishments with a die cut and a bit of lace. I then punched holes into the tops and added some ribbons

Thursday, 18 April 2013

Studio 12 Gift Set

Hello folks, it's Fliss here with you today with an idea for gift giving with a matching card perfect for a dear friend.
It's actually easier to make than it looks so read on to see how it came together.


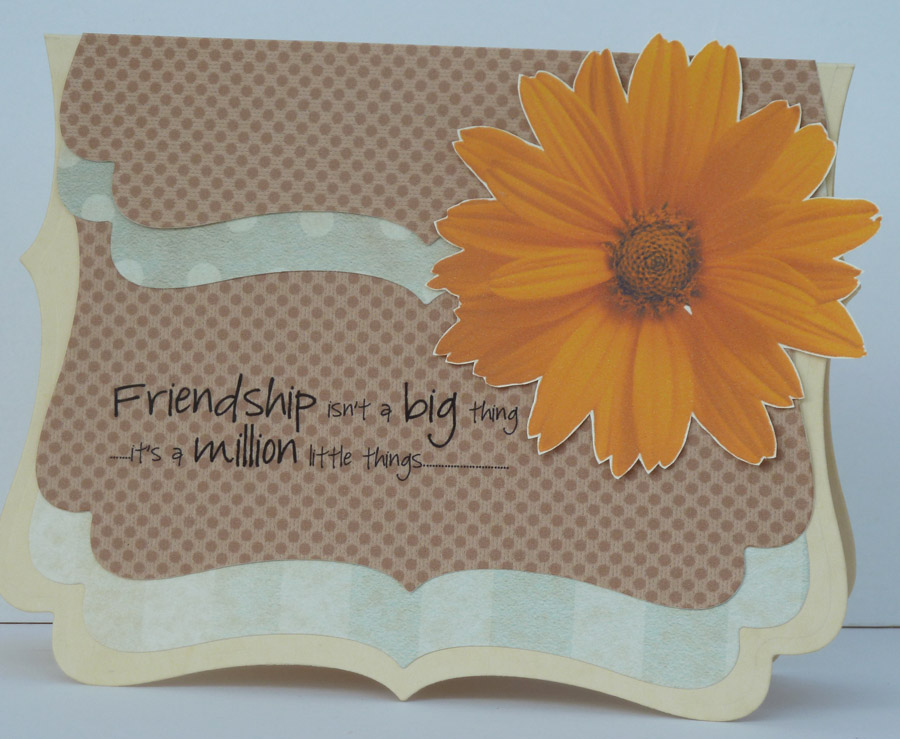
Apart from the kraft dotty paper which I sneaked in from the Polka Doodles Double Sprinkle Of Kraft CD, all the elements and papers are from the Garden Collection on the Studio 12 Picknix Collection 1 CD.
I made the patchwork style paper which I used to decorate a plain kraft bag by resizing 3 of the green papers and 3 of the flowers to 5cm square in my photo editing software and then dropped them into a Word document in the design you can see. I printed it out on the antique beige old fashioned parchment card for a soft look then tore the edges and inked them with Antique Linen Distress ink before attaching to the bag.
I then printed out 2 of the yellow daisies, again resizing them and then fussy cut them out. I cut out a circle of the dotty paper and attached the daisy to this then punched a hole in the top and tied the tag to the bag with twine.
I then used a large frilly die to cut out my card blank from beige card and used the next size down to cut out the layers of green patterned paper. I printed the sentiment from the CD directly on to the kraft dotty paper and then die cut this and a further layer. I assembled them on the card blank and added the daisy at the top right side.

Just the thing to make for a special friend whether for a birthday or just to say thanks for being a friend.
Hugs, Fliss xx